Steel-Cut Oatmeal and Chocolate Chip Muffins

 oatmeal-muffins

Back to school means MUFFINS!!  When I am really in the running for “Mom of the Year” award, it is because I took a couple of hours on Sunday to make something absolutely delicious for breakfast.  Something homemade that is easy enough to eat on the go, or warmed up in the microwave with some melted butter.  Unfortunately it doesn’t happen as much as they would like (or I would for that matter).  I had every intention of making some fresh scones today, but it is now close to 9:00pm, and that didn’t happen.

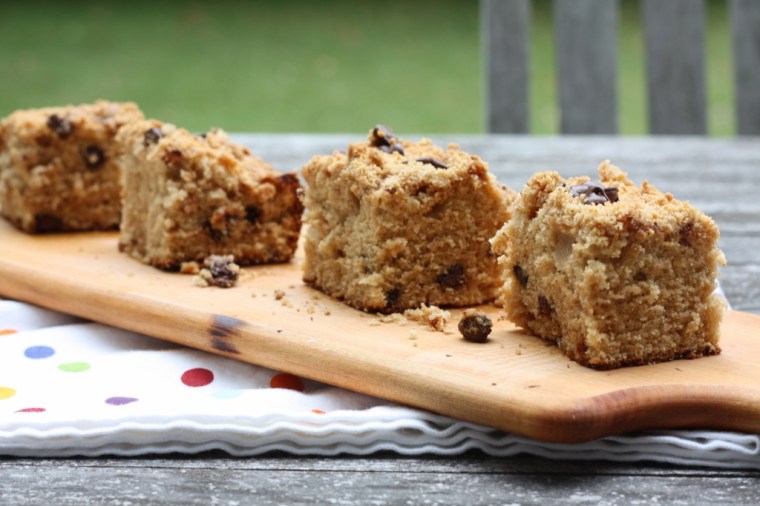
The other week though, thanks to Bob’s Red Mill – I did have an opportunity to apply for the award, after making these scrumptious morsels.  The oatmeal and coconut sugar did not disappoint…although the star of the show was the mini-chocolate chips.  Both girls loved the muffins, I didn’t even have to remind them to eat the muffins for breakfast – which is when I know they are a total hit.

So this year, why not make waking up for school something to look forward to – I know it is not time for resolutions just yet, but this is going on my list – to bake something at least once a month – which takes care of an entire week of breakfasts. Then I know that at least 25% of the month, I can look forward to that red carpet award ceremony…

Please note: As a Team Stonyfield ambassador, I am being compensated. All opinions about Stonyfield Farm’s products and Bob’s Red Mill products are always my own.

Ingredients

Preparation

To cook the steel-cut oats, boil 3 cups of water, then add 1 cup steel-cut oats with 1/4 teaspoon salt.  Cover and simmer for 20 minutes.  When the oats are done, stir in 1/4 cup coconut sugar.

Preheat the oven to 375 degrees with the rack positioned in the upper third. Oil, spray or butter 12 muffin cups.

Sift together the flours, baking powder, baking soda, 1/2 teaspoon of salt and 1/2 cup coconut sugar. In another bowl, beat together the eggs, yogurt, milk, canola oil, and vanilla. Quickly stir in the dry ingredients with a whisk or a spatula. Do not beat, just mix, stirring up from the bottom until you can no longer see flour. A few lumps are fine. Fold in the cooked oats and the chocolate chips.

Spoon into muffin cups, filling them to just below the top. Sprinkle coconut sugar on top if desired.  Place in the oven, and bake for 20 to 25 minutes until nicely browned. Remove from the heat, and allow to cool for 10 minutes before unmolding. Cool on a rack, or serve warm.

For a printer-friendly version of this recipe, please click here: steel-cut-oatmeal-and-chocolate-chip-muffins

oatmeal-muffins-2

Advertisement

Fig and Fennel Flower Shrub

fig-and-fennel-shrub

I am still waiting for shrubs to be the “in” thing – but I feel like it is getting close.  Once a week the farmer’s market comes to the campus where I work – I swear that is the day when everything comes alive.  There is definitely something to be said for little white tents and crowds everywhere.  There is a vibrancy that exists, you can feel it in the air.

Although there are a lot of great vendors that come, the one I like the most is the jam and shrub vendor.  Their products are excellent, and wish I could buy a different variety each week – but then I remind myself how easy it is to make them myself…both the jam and the shrubs.  I have had to slow down on the jam making this year – work is creeping into my weekend time, but there are no excuses when it comes to shrubs.  They are seriously so simple and easy – and store beautifully in the refrigerator.

The other week I got some figs in my market basket along with fennel flowers.  There are always so many ways to use up the figs, but it was the fennel flowers that I wanted to make the most of – so there I went experimenting – with shrubs this time.  I am in love with this variety – it definitely makes the most delicious cocktails. And look at that color – who wouldn’t want to drink something that is that beautiful?  Who cares if others haven’t picked up on this craze, shrubs are definitely “in” at my house.

Ingredients

  • 2 cups chopped figs
  • chopped fennel flowers
  • 2/3 cup sugar
  • 2/3 cup apple cider vinegar

Preparation

Place all ingredients in a small saucepan.  Cook on medium heat until the sugar dissolved, and the fruit starts to break down.  Simmer for 10 minutes, then strain with cheese cloth into a container.  Store in the refrigerator for a few months.

Use the fig and fennel shrub in a cocktail with gin, vermouth and lemon, or just serve with sparking water for a refreshing summer drink.

For a printer-friendly version of this recipe, please click here:  fig-and-fennel-flower-shrub

Peanut Butter Chocolate Chip Yogurt Cake

Peanut Butter Chocolate Chip Yogurt Cake 2

Before I get into this post – I want to apologize again for my sporadic postings these days…and although I might not post as much as I used to, I am posting a lot more on Instagram.  So please, if you are as excited as I am these days about Instagram, please take a look @firstlookthencook.  I will often preview what I will be posting…like this weekend’s Fig and Fennel Shrub.

I have been baking cakes for a long time – I started when I was very little with my Easy Bake Oven – but there have only been a couple of cakes over the years that have really rocked my world.  One of them is a coconut cake that is exceptional, but it is a little stressful to make.  Whenever you are dealing with more than one layer, things can get a little dicey.  One day I remember making this cake, then having to drive 13 miles to work in the hot sun – by the time I got there, the cake looked like the leaning tower of Pisa. Of course it still tasted great, but I definitely grew some gray hairs during the process.

This is the other cake that falls in that category – I have made this cake more times than I can count.  It is my go-to-cake for any occasion because it is quick, easy, and unbelievable moist and delicious.  I haven’t done much experimenting with this cake – but when I was asked to come up with a recipe that incorporates Justin’s All-Natural Peanut Butter with Stonyfield yogurt, there was only one idea that I kept coming back to…it was time to change it up a bit.  This cake was every bit delicious with yogurt than it is with milk – and using Justin’s Peanut Butter took off a little bit of the sweetness, which in my mind is always a good thing.  Once again, this cake did not disappoint – and now I have a great excuse to make another with the leftover ingredients…

Please note: As a Team Stonyfield ambassador, I am being compensated. All opinions about StonyField Farm’s products and Justin’s All-Natural Peanut Butter are always my own.

Ingredients

Preparation

Preheat oven to 350°F. Butter 13x9x2-inch metal baking pan. Combine first 4 ingredients in large bowl. Using electric mixer, beat on low speed until streusel is blended and crumbly. Transfer 1 cup lightly packed streusel to small bowl and reserve. Add eggs, yogurt, vanilla, baking powder, and baking soda to remaining streusel in large bowl. Beat at low speed until evenly moist. Increase speed to medium and beat until well blended, scraping bowl occasionally, about 3 minutes. Stir in 1 cup chips. Transfer batter to prepared pan. Sprinkle with reserved 1 cup streusel and remaining 1 cup chips.

Bake cake until tester inserted into center comes out clean, about 35 minutes. Cool cake in pan on rack.

For a printer-friendly version of this recipe, please click here: Peanut Butter Chocolate Chip Yogurt Cake

Truffled Deviled Eggs

Truffled Deviled Eggs

Most of the time, this blog is a really nice distraction from real life.  I can immerse myself in cooking, and not even think about what is going on in the rest of the world.  This week, it was a little difficult.  Between the random acts of violence everywhere lately, and then learning about our friend Eden – I would say that not much was a successful distraction.  I am sending good thoughts out everywhere right now, but in particular to Eden, who I believe is a model of strength, dignity and grace.  Eden, if anyone can get through this, you can – we are all sending you lots and lots of love!  And soon some food :)

This month’s awesome opportunity from Stonyfield Farms was just too good to be true.  I feel like I have every kitchen gadget and serving dish that anyone could want – although there was always the missing egg tray.  I love making deviled eggs, but I just never saw the absolute need to get one.  You can find many deviled egg recipes on this blog, with pictures either taken on a regular tray or a slightly interesting shape – but none on a traditional egg tray.  When Le Creuset sent this deviled egg platter – I was beside myself.  But wait, there was more – I also received some amazing kitchen tools from Kitchen IQ.  Some stackable measuring spoons, and cutting boards.  These very flexible cutting boards have a non-slip surface underneath – shear genius. I have been using flexible cutting boards for a while, but I always have to add a non-slip mat underneath so they don’t slide all around.  Both of those came in handy when making these eggs – and now those cutting boards are the ones I go to first when I start chopping.

I had never tried making deviled eggs with yogurt before, but now that I have – I am a convert.  The yogurt made the filling creamy and delicious – although I must say that the truffle mustard stole the show.  Wow.  Needless to say, they didn’t last long – but now that I have a deviled egg tray, I will be making these more often…

Please note: As a Team Stonyfield ambassador, I am being compensated. All opinions about StonyField Farm’s products, Le Creuset and Kitchen IQ are always my own.

Ingredients

Preparation

Boil 12 large eggs so the yolks are medium-rare, about 8 minutes. This keeps the mixture rich and not dry. Shock the eggs in a bowl of ice water, then peel and halve the eggs lengthwise with a sharp knife, wiping the knife clean between each egg. You can just mash the yolks with a fork in a small bowl, but for a totally lumpless filling you can use a food processor.

Add 1/2 cup of yogurt and 1 tablespoon truffled mustard to the mashed yolks. Season the mixture with kosher salt and pepper and stir until creamy. If you’re making the filling ahead, store it in the fridge and fill the egg white halves just before serving.

Spoon or pipe about a tablespoon of filling in each of the egg whites.  Fry the chopped pancetta in a saute pan until crispy.  Drain the fat and let cool on some paper towels then sprinkle on top of egg filling along with the chopped chives. Do this just before serving so the pancetta stays crispy.

For a printer-friendly version of this recipe, please click here:  Truffled Deviled Eggs

Avgolemono Soup

Avgolemono Soup

The last few weeks have been a complete blur to me.  Between a quick trip to NYC for a wedding, our cat on the brink of survival (but has come back!), being without a washing machine for almost 3 weeks, and within 48 hours of school ending then taking our kids to overnight camp – all while working like a crazy woman – it is no wonder I feel this way.  Thank goodness that I am finally able to catch up on life.

It is definitely quiet in the house right now – this is the first time the girls have gone to overnight camp, and they will be gone for 10 days.  I remember going to overnight camp for the first time – although my mother had to remind me that as we were arriving, I decided I didn’t want to go anymore – but thank goodness they didn’t fall for that.  I remember having the time of my life.  I also remember coming home and begging to go back…it was certainly one of the highlights of my childhood.

Back then there were no computers, no Facebook, Instagram, Twitter – and now I can get updates from all of those places – and even send my kids emails.  Although they don’t allow any electronic devices (how would I survive??) they will scan a handwritten letter and send it to you via email (for a small cost of course) so your kids can reply to the email letters they receive.  Amazing.

I learned that their first meal at camp was grilled cheese and tomato soup – sounds perfect.  Funny that I was thinking about another soup – this delicious lemony rice soup – perfect for summertime.  My trusty market basket came with all the ingredients to make this amazing soup, and I know that makes a big difference – using fresh lemons and farm fresh eggs.

Before I forget – we have a winner in the prAna dress giveaway!!  Congratulations to Mari!  She has been a faithful reader for quite sometime, and am so glad I am able to show her some gratitude curtesy of prAna.  Mari – I will be in touch with the details!

Ingredients:

  • 8 cups Farm & Larder chicken stock
  • 1 cup long-grain white rice
  • 4 eggs
  • Juice of 3 lemons
  • Chopped fresh parsley
  • Sea salt and fresh ground pepper

Preparation:

Bring stock to a boil in a 4-qt. saucepan over high heat. Reduce heat to medium and stir in rice; cook, partially covered and stirring occasionally, until rice is tender, about 20 minutes.

Whisk eggs and juice in a bowl until frothy, add 1 cup of the simmering stock and whisk to combine; transfer back to the pot.

Cook, while stirring, about 2 minutes more; season with salt and pepper and garnish with parsley.

For a printer-friendly version of this recipe, please click here:  Avgolemono Soup

Yogurt-Cheese Tarts with Mint

Yogurt-Cheese Tarts with Mint

It is definitely summer in Seattle, as I sit here in the dark typing this, because even turning on the lights will heat the house up more than I can tolerate at this point.  That decision we made 12 years ago to forgo air conditioning comes back to haunt us every year – more and more as our climate seems to be changing.

So what do I crave in the summer?  Well, I certainly crave sleeveless dresses.  I have way too many in my closet, but as soon as it gets above 80 degrees, that’s what you will find me in.  And what am I eating?  Well, even in the sweltering heat last summer in Paris – we had cheese at every meal.  So this summer, when I am craving cheese – you will definitely find me with these delicious tarts (adapted slightly from Cooking Light) – made with the creamiest yogurt ever – Stonyfield Farm’s organic whole milk greek yogurt – because with mint, it is a wonderful refreshing combination.

prAna so graciously gave me this dress in the photograph, and if you have made it this far in the post – you too can get yourself one of these!  This dress fits perfectly, and is so comfortable that I want to wear it everyday.  I am such a sucker for soft cotton, and this is exactly what I love to wear.  Please leave a comment to be entered into a drawing for a summer prAna dress of your own, and free yogurt coupons!  Drawing will take place on June 15th, and I will announce the winner shortly afterwards.

My readers can save 15% off your prAna order with this special code: SCS16DAKL

This offer is not valid for prAna Influencers, on Gift Certificates or with any other offers.

Offer valid from now until July 7!

Please note: As a Team Stonyfield ambassador, I am being compensated. All opinions are always my own.

Ingredients

  • 3 1/2 tablespoons cornstarch
  • 3 tablespoons 2% reduced-fat milk
  • 2 cups plain Stonyfield Farm’s Organic Whole Milk Greek yogurt
  • 1/4 cup packed fresh mint leaves
  • 1 teaspoon grated lemon rind
  • 1/2 teaspoon freshly ground black pepper
  • 1/4 teaspoon kosher salt
  • 2 ounces reduced-fat feta cheese, crumbled (about 1/2 cup)
  • 2 ounces Gorgonzola cheese, crumbled (about 1/2 cup)
  • 1 large egg
  • 1 egg white
  • 12 small fresh mint leaves

Preparation

Preheat oven to 325°.

Combine cornstarch and milk in a small bowl. Place cornstarch mixture, yogurt, mint, rind, pepper, salt, feta, and Gorgonzola in a food processor; pulse to blend. With processor on, add egg and egg white; process until creamy.

Spoon 1/4 cup yogurt mixture into each of 12 small ramekins or custard cups. Bake at 325° for 25 minutes or until tarts are almost set but still slightly wobbly. Turn off heat; leave in oven 5 minutes. Remove from oven; cool 15 minutes. Top each tart with a mint leaf.

For a printer-friendly version of this recipe, please click here: Yogurt-Cheese Tarts with Mint

Chocolate, Peanut Butter and Banana Smoothie

Chocolate, Peanut-Butter and Banana Smoothie

My husband is a creature of habit.  When he finds something that he likes, he sticks with it, that is until he is sick of it.  The smoothie sensation has been going on for quite some time in our house though – he will mix it up a bit, but it always has one consistent ingredient – protein powder.  Over the years he has tried a couple different brands – but lately he has been looking for something new.

Through the Stonyfield Farms Blogger Club, I was introduced to The Healthy Skoop, this plant-based protein powder.  For every serving of Skoop sold, Healthy Skoop donates one serving of free fresh fruits and veggies to a school lunch program in America.  Come on, how can you not love that?  Fortunately I was given the opportunity to try some (chocolate…YUM!!), and now I am sold.  We tried it two ways – the first was just to mix some with milk in this handy cup with a whisk attachment.  Now I am not a huge protein powder person, and this was not my favorite.  It was just a little grainy for me, although the flavor was great.

Then I decided to make a smoothie – my favorite kind, with some grassfed stonyfield farms vanilla yogurt, peanut butter and a frozen banana and WOW!!  It was a complete winner – my daughter and I were fighting over seconds.  The Healthy Skoop may have just made me into a smoothie lover too.

Please note: As a Team Stonyfield ambassador, I am being compensated. All opinions are always my own.

Ingredients

Preparation

Put all ingredients in a blender, and blend until smooth.

For a printer-friendly version of this recipe, please click here:  Chocolate, Peanut Butter and Banana Smoothie

Chocolate Dreams (aka Surprise Cookies)

Chocolate Surprise Cookies

Wow, could it possibly be May already?  Well, considering that today is Mother’s Day, then yes, it must be.  I completely missed posting in April all together – I think that may just be a first for me – but I have not given up.  I am just slowing down a bit as the other parts of my life have been ramping up.  There are only so many hours in each day, and in order to try and stay sane, I have decided not to do it all.  Boy does that feel good to get out in the open.

Last month I forgot those words though, and I signed up for Book Larder’s Cookie Contest.  I knew it was the last possible thing I needed to do in my life, but I knew the girls would love it, so I gave in.  A few days before the contest, I still hadn’t decided what to make – and that’s where my very capable daughter came to the rescue.  She decided to test out a recipe that looked just AMAZING from the Martha Stewart’s Cookie book – and we were all sold.  They were moist, chocolatey, and had a fluffy marshmallow in the center.

Unfortunately we didn’t win, but that’s not at all why I did this.  We had a fun couple of hours stressing out trying to finish these cookies in time to get there for the judging – it was exactly my style – nothing like getting there just in time.  But we did, and it was super fun.  I must say that there are a lot of awesome bakers in Seattle.

So to all the mother’s out there – today is your day – and I hope you thoroughly enjoyed yourself.  Maybe next weekend you can bake these cookies for your kids to thank them…Happy Mother’s Day!!

Ingredients

Cookies

  • 1 3/4 cups all-purpose flour
  • 3/4 cup cocoa powder
  • 1/2 teaspoon baking soda
  • 1/2 teaspoon salt
  • 1/2 cup (1 stick) unsalted butter, softened
  • 1 cup sugar
  • 1 large egg
  • 1/2 cup milk
  • 1 teaspoon pure vanilla extract
  • 12 large marshmallows, cut in half horizontally

Chocolate Frosting

  • 3 cups confectioners’ sugar
  • 6 tablespoons unsalted butter, melted and cooled
  • 1/4 cup plus 1 1/2 t. cocoa powder
  • 1/4 cup plus 2 T. milk
  • 3/4 teaspoon pure vanilla extract

Preparation

Preheat oven to 375 degrees. In a medium bowl, whisk together flour, cocoa powder, baking soda, and salt; set aside.

In the bowl of an electric mixer fitted with the paddle attachment, cream together butter and sugar until light and fluffy, about 2 minutes. Add egg, milk, and vanilla, and beat until well combined. Add reserved flour mixture; mix on low speed until combined.

Using a tablespoon or 1 3/4-inch ice cream scoop, drop dough onto ungreased baking sheets, about 2 inches apart. Bake until cookies begin to spread and become firm, 8 to 10 minutes. (I think next time I’ll only bake them 7 minutes)

Remove baking sheets from oven, and place a marshmallow, cut-side down, in the center of each cookie, pressing down slightly. Return to oven, and continue baking until marshmallows begins to melt, 2 to 2 1/2 minutes. Transfer cookies to a wire rack to cool completely before frosting.

Place confectioners’ sugar in a medium bowl. Whisk in butter and cocoa powder. Add milk and vanilla, and whisk until well combined. Spread about 1 tablespoon of frosting over each marshmallow, starting in the center and continuing outward until marshmallow is covered.

For a printer-friendly version of this recipe, please click here:  Chocolate Dreams

Mini-Chocolate Chip Bundt Cakes

Mini-Chocolate Chip Bundt Cakes

Hard work really does pay off.  I tell my kids this all the time, and I actually think that they are finally starting to believe it.  Hard work is not easy though – which is why they call it hard…and I often see them on the brink of just throwing in the towel.  All it takes though is for one win, and it gives them the strength to keep going.  It is just one of the many reasons that I love being a parent.

Fortunately it doesn’t always take a lot of hard work to make a delicious dessert that the entire family can enjoy.  I found this recipe in Cooking Light many moons ago, and the other weekend I decided to dust off my mini-bundt pan to test these babies out.  I have such limited time these days to bake, and this recipe looked like one that I could actually fit into my schedule.  These were so good, I made them the next weekend as well.  It is not often that I do that, but these were that good.  The glaze was not very thick, but it didn’t need to be – it offered just the right amount of sweetness to brighten up the cake.

So choose wisely what you want to focus your hard work on – you don’t have to be good at everything.  But when you focus your attention and it actually pays off, the victory is sweeter than you can imagine…just like a delicious dessert.

Ingredients

  • 9 ounces white whole-wheat flour (about 2 cups)
  • 1 teaspoon baking powder
  • 1/2 teaspoon baking soda
  • 1/2 teaspoon salt
  • 1/2 cup unsalted butter, softened
  • 1 teaspoon vanilla extract
  • 2 large eggs
  • 1 cup reduced-fat buttermilk
  • 1 cup mini-chocolate chips
  • Baking spray with flour or butter and flour
  • 1 cup powdered sugar
  • 2 to 3 teaspoons water

Preparation

Preheat oven to 350°.

Weigh or lightly spoon flour into dry measuring cups; level with a knife. Combine flour, baking powder, baking soda, and salt in a bowl, stirring well with a whisk.

Place butter and remaining 1 cup granulated sugar in a bowl; beat with a mixer at medium speed until fluffy (about 5 minutes). Beat in vanilla. Add eggs, 1 at a time, beating well after each addition. Add flour mixture and buttermilk alternately to butter mixture, beginning and ending with flour mixture.  Fold in mini-chocolate chips.

Divide batter into each of 4 mini-bundt loaf cups coated with baking spray (or coated with butter than flour), spreading into an even layer. Bake at 350° for 25-30 minutes or until a wooden pick inserted in centers comes out clean. Cool in pans on a wire rack 10 minutes; remove cakes from pans. Cool completely on wire rack.

Combine powdered sugar and 2 to 3 teaspoons water in a small bowl, stirring until smooth. Drizzle glaze evenly over cakes.

For a printer-friendly version of this recipe, please click here:  Mini-Chocolate Chip Bundt Cakes

Almond-Chocolate-Espresso Coffee Cake

Almond-Chocolate-Espresso Coffee Cake 2

It’s hard to get yourself out of a rut, particularly when you have been doing something a certain way for years, and it works.  We all know the phrase – if its not broken, don’t fix it.  Well, it’s not always that easy.  Sometimes if you keep doing things one way, you are missing out on something better.  That is one of the reasons why I love to cook – I am always searching for the perfect recipe – one that is better than the one I previously thought was perfect.  And I think of my kitchen as my lab – I am always experimenting.

Many months ago, I signed up to be a Stonyfield ambassador by applying to be in their blogger club.  When I was accepted, I almost wrote back and said thanks, but no thanks.  My life is like one of those duffle bags that is completely stuffed – I can’t fit even one more sock in.  But if I need that sock, I have to figure out what I am going to take out.  I still haven’t quite figured that out, but all I know is I never did decline the invitation, so here I am, stuffing one more thing in.

The good news is that it doesn’t seem like it is going to be that time consuming, especially because I love cooking and baking with yogurt – and this February’s opportunity also included Devine Chocolate.  Yum!

My girls had been asking me to make a coffee cake for a while, and all of a sudden it hit me – why do you need to use sour cream or buttermilk in a coffee cake, why couldn’t you use yogurt instead?  So I started researching a little – and I learned that it is a perfect substitution, and with a little milk, you have basically created your own buttermilk.  So, I heavily adapted this recipe that I found in the Back in the Day Bakery Cookbook, and I created my own perfect coffee cake.  The yogurt made the cake super moist, with a slight tang – and the chocolate bar – oh my word.  That was just perfect as the topping.

So the next time you go through the motions, doing the same thing you have always done – think more broadly – be creative, and think about ways in which you can make it better.  There is always a way…

Please note: As a Team Stonyfield ambassador, I am being compensated. All opinions are always my own.

Ingredients

  • 2 cups unbleached all-purpose flour
  • 1 cup packed light brown sugar
  • 1/2 cup granulated sugar
  • 8 tablespoons (1 stick) unsalted butter, at room temperature
  • 3/4 teaspoon salt
  • 3.5 ounce Devine Chocolate with Whole Almonds Bar, finely chopped
  • 2 teaspoons espresso powder*
  • 1 teaspoon baking soda
  • 3/4 cup Stoneyfield Farms plain yogurt
  • 1/4 cup milk
  • 1 large egg
  • 1/2 teaspoon pure vanilla extract
  • 1/2 teaspoon pure almond extract

Preparation

Position a rack in the lower third of the oven and preheat the oven to 350˚F.  Spray a 9-inch square baking pan with vegetable oil spray and line the bottom with parchment.

In the bowl of a stand mixer fitted with the paddle attachment (or in a large mixing bowl, using a handheld mixer), mix together the flour, both sugars, the butter and the salt until the mixture resembles coarse meal.

To make the crumb topping, transfer 3/4 cup of the mixture to a small bowl and stir in the chocolate and espresso.  Set aside.

Sprinkle the baking soda into the remaining butter-sugar mixture.  Whisk the yogurt together with the milk. Add the yogurt/milk mixture, egg, vanilla, and almond extract to the butter-sugar mixture, and mix just until combined.  Scrape the batter into the prepared baking pan, spreading it evenly.  Sprinkle the crumb topping evenly over the batter.

Bake for 40 to 50 minutes, until the top is golden brown and a cake tester inserted in the center of the cake comes out clean.  Remove to a wire rack and allow to cool in the pan.

* If you find yourself without espresso powder, replace it with 1 teaspoon cinnamon for an equally delicious cake.

For a printer-friendly version of this recipe, please click here:  Almond-Chocolate-Espresso Coffee Cake