Nan’s Apple Cobbler

Nan's Apple Cobbler

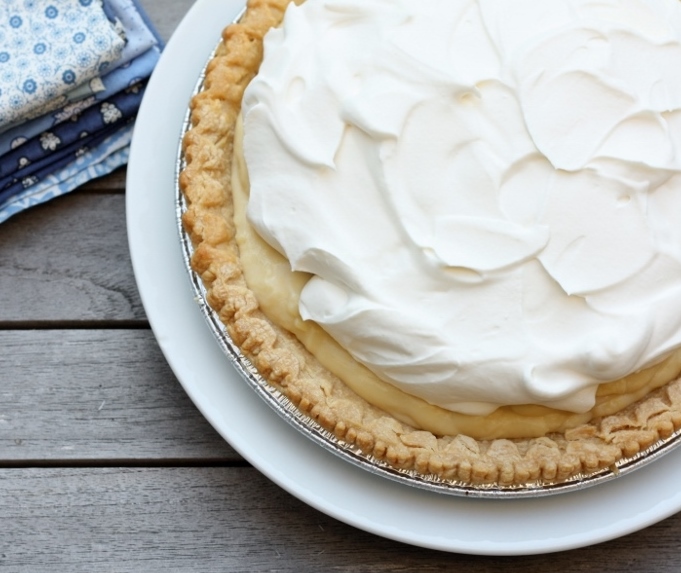
Before I get into this week’s post…I want to bring you back to the Samoas Ice Cream Pie – remember that one?  As luck would have it, I managed to make it as a finalist in the Girl Scout Cookie Recipe Contest!!  HORAAY!!!  That means I NEED YOUR HELP.  The winner with the most votes wins the contest – you can help me out here.  You only have until February 27th at 10pm to vote.  One vote per person, so tell your friends!  Now if I win, I am going to donate the money to charity.  Which charity?  Well, that’s where you come in!  Please leave a comment with your favorite charity, and if I win, I will randomly select one. Oh, and one more thing – cookies go on sale Monday, February 27th and last until March 15th.  So you have a few weeks to stock up on those cookies – particularly the Samoas, so you can make that Ice Cream Pie!  Remember, it is Samoas 40th Birthday!!

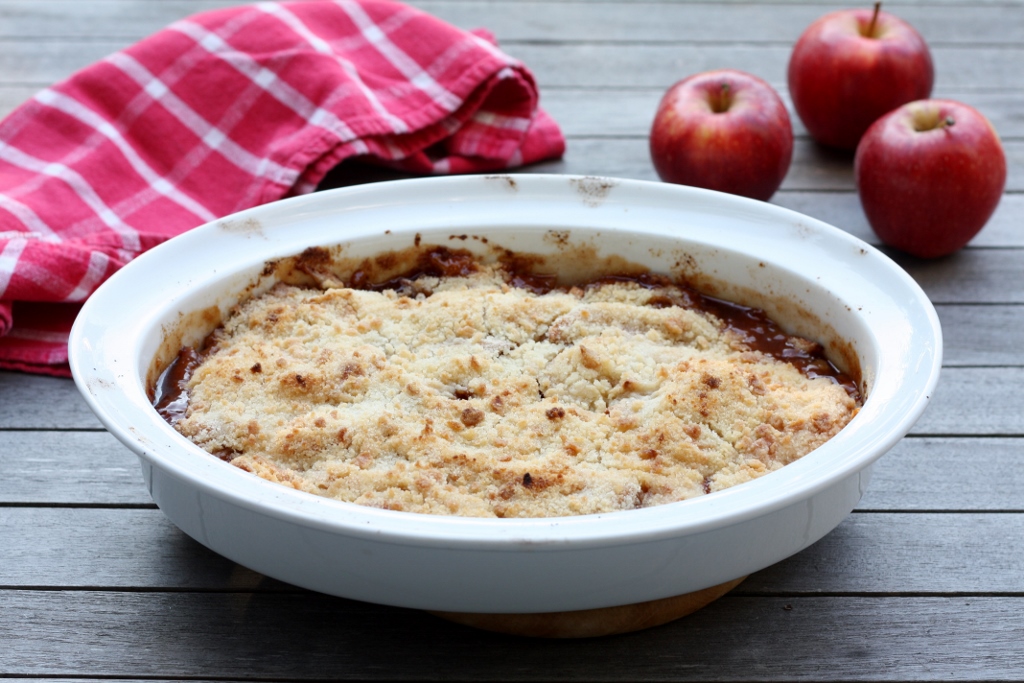
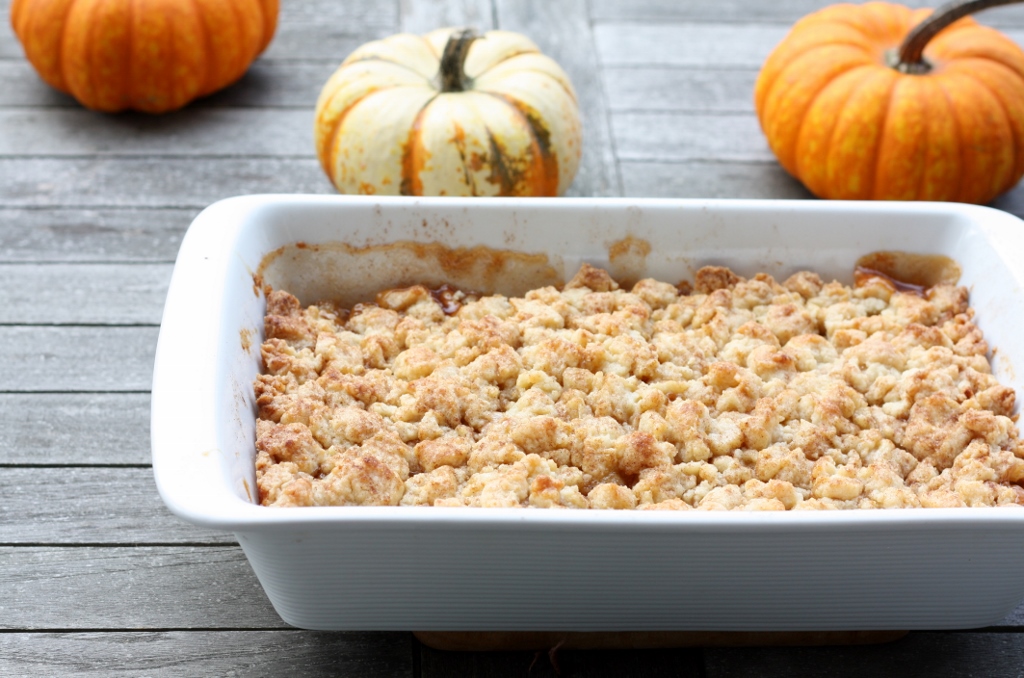
I know what you are thinking…what are those pumpkins doing in this post?  Well, I am behind…more than just a little.  I still haven’t even made the neighbors their special holiday treats…hopefully I will catch up soon.  I am just dealing with a lot these days.  So what does this amazing looking Apple Cobbler have to do with the Samoas Ice Cream Pie?  The crust!!  In the Samoas Ice Cream Pie, the ice cream was something else – but it was nothing compared to that crust.  Well, here we go again, except that this time the ratio of crust to filling is about 1:1.  You don’t get that very often.  But this cobbler is all about the crust – my grandmother definitely knew what she was doing here – but then again, when did she not when it came to desserts?  Remember, I used her fudge recipe for the pie as well.

So, even though the fall is long gone, it is always apple season here in the pacific northwest – and this cobbler is calling your name.  That is after you pick up some Girl Scout Cookies and make that Samoas Ice Cream Pie…

Ingredients

Topping

  • 2 cups + 1 tablespoon all-purpose flour
  • 1/8 rounded teaspoon baking powder
  • 2/3 cup sugar
  • 2 sticks of butter
  • 1/2 teaspoon vanilla
  • 1 tablespoon bourbon (or vanilla)
  • 1 teaspoon white vinegar
  • 1/4 cup milk
  • turnbinado sugar

Filling

  • 3 pounds Golden Delicious apples, peeled, cored, thinly sliced
  • 1/4 cup sugar
  • 1/2 cup (packed) golden brown sugar
  • 2 tablespoons all-purpose flour
  • 1/2 tablespoon lemon juice
  • 2 teaspoons cinnamon
  • 1/8 teaspoon ground nutmeg

Preparation

Make the topping – combine the flour, baking powder and sugar.  Add the butter in 1 tablespoon chunks, and mix with your fingers until it looks like course meal.  Add the vanilla, bourbon and vinegar and gather up into a ball using plastic wrap – then throw against the counter until it is all combined well.  Chill for about 2 hours. Mix the apples with the rest of the ingredients.  Grease an 7X11 glass baking dish.  Add apple mixture.  Remove topping from the refrigerator, and break into small chunks all over the apple filling.  Brush with the milk, then sprinkle with sugar.  Bake in a 375 preheated oven for 10 minutes, then reduce the temperature to 350 and cook until bubble and the topping is golden, about 20-30 minutes more.

For a printer-friendly version of this recipe, please click here: Nan’s Apple Cobbler

Advertisement

Apple-Toffee Hand Pies

Apple-Toffee Hand Pies

A huge weight was lifted off my shoulders today, and for part of the day, I actually felt like I was actually going to be able to breathe again.  My mind is like a three-ring circus these days.  When one act finishes, there is another act starting up on another part of the stage.  There is always something going on, and everyone around is becoming way over stimulated.  It is hard to know when to just stop the show.  So far that has not happened yet…and it is becoming a little scary.  Can the performers actually keep going day after day, night after night?  No way, it is not sustainable…but somehow they keep going.

Tonight there was a little break in my show though, and for about 60 minutes, I was actually floating.  There were a lot of stories about Paris, and about the people in France – how they don’t like to bake – that’s what bakeries are for…and then there were the descriptions of different recipes.  Wonderful recipes, where you can obsess over how delicious the end result is.  And those cream puffs…that were filled a la minute.  Pinch me.

Yes, tonight I was lucky enough to see Dorie Greenspan talk about her latest book.  She is just incredible – such a pleasure to experience.  It really reminded me why I started this blog to begin with.  It was a break, a deviation of normal life – and a way to share recipes and food with others.

I have not had a lot of time to focus on posting lately, but that doesn’t mean I haven’t been baking.  It is my favorite season right now, and I have not be wasting it away – but I also have run myself ragged trying to keep up.  I saw this recipe twice before I really couldn’t let another weekend go by before making them.  This recipe came from Cooking Light – although one of my favorite food bloggers also recently posted her version.  What a cute and delicious treat.  The only thing I would change here is to use a homemade crust – but desperate times call for desperate measures – and I settled.  The concept was perfect, and the filling tasted like fall…and next time with a homemade crust, these will shine – just like the tight rope walkers…yep, the circus is starting up again.  The show must go on.

Ingredients

  • 2 cups finely chopped Gala or Rome apple
  • 2 tablespoons toffee chips
  • 1 tablespoon sugar
  • 1 1/2 teaspoons fresh lemon juice
  • 1/2 teaspoon ground cinnamon
  • 1 (14.1-ounce) package refrigerated pie dough (such as Pillsbury)
  • Cooking spray
  • 1 large egg, lightly beaten
  • 1 tablespoon unsalted butter, cut into 12 cubes

Preparation

Preheat oven to 375°. Combine apple, toffee chips, sugar, lemon juice, and cinnamon in a medium bowl. Roll the pie dough on a lightly floured surface into 2 (12-inch) circles. Using a 3-inch round cookie cutter, cut each dough portion into 12 rounds. Discard any remaining dough scraps. Place 12 dough rounds on a baking sheet coated with cooking spray. Brush half of the beaten egg over dough rounds. Spoon about 1 tablespoon apple-toffee mixture onto each round, leaving a 1/2-inch border around the edges of the dough. Top each round with 1 piece of butter. Top pies with remaining 12 rounds of dough; press edges together with a fork to seal. Brush remaining half of beaten egg over each pie. Bake at 375° for 25 minutes or until golden brown.
For a printer-friendly version of this recipe, please click here: Apple Toffee Hand Pies

Blueberry Hand Pies

Blueberry Hand Pies

I am trying to soak up the last bit of summer, although to let you in on a little secret – I am really looking forward to fall.  Of course I can never get enough of those delicious Washington berries, and it makes me sad that my local fruit hut has already closed for the season – but fortunately there were still some stands at the farmer’s market selling blueberries and raspberries, so I snatched up a flat.  But I am looking forward to all of my fall favorites with apples and pears – and hopefully our fall will be as nice as our summer was – boy are we getting spoiled.

I actually can’t believe that an entire year has gone by since the International Food Blogger’s Conference – yes, it is that time of year – and I can’t wait.  Last year it was at a smaller venue so they had to limit attendance.  This year it looks like there are more than double the number of people attending – Seattle watch out.  I hope all the restaurants and bakeries in the area are ready for rush of people they will get next weekend – that is if there is any room in their stomachs after all the food sampling at the conference.  Last year I really got to try some amazing products – I am looking forward to seeing what is in store for us this year.

Summer would not be complete unless I made some type of hand pie.  This year I decided on blueberry, after seeing this recipe in Bon Appetit.  I made a few adjustments to the recipe (using the end of a fork to seal the ends together, and adding cinnamon), but other than that, this recipe was perfect.  The flakey crust was crisp on the outside, tender on the inside, and just buttery good.  They were even better when we had them right out of the oven, although we did not turn them away the next day, completely at room temperature.

So hopefully I will see some of you at the conference next week – I am not the most social or gregarious food blogger, so these things are not easy for me – but last year I met some really wonderful people.  I think it says a lot that I signed up again.  See you soon!

Ingredients

  • 1 1/2 cups all-purpose flour
  • 1/2 teaspoon sugar
  • 1/4 teaspoon kosher salt
  • 1/2 cup (1 stick) chilled unsalted butter, cut into 1/2-inch pieces
  • All-purpose flour (for dusting)
  • 2 cups blueberries (about 10 ounces)
  • 1 teaspoon finely grated lemon zest
  • 1 tablespoon fresh lemon juice
  • 1/4 cup sugar
  • 1/4 teaspoon kosher salt
  • 1 large egg, whisked with 1 teaspoon water
  • 1 tablespoon raw sugar

Preparation

Pulse flour, sugar, and salt in a food processor. Add butter; pulse until the texture of very coarse meal. Add 1/4 cup ice water; pulse, adding more water if dry, until dough comes together in clumps. Form into a square, wrap in plastic, and chill until firm, about 2 hours.

DO AHEAD: Crust can be made 3 days ahead. Keep chilled. Let stand at room temperature 15 minutes before rolling out.

Preheat oven to 375°.Roll out dough on a floured surface to a 15×12-inch rectangle. Cut into 6 rectangles.

Toss blueberries, lemon zest, lemon juice, sugar, and salt in a medium bowl. Brush edges of rectangles with water; mound some blueberries in center of each. Fold dough over, and press edges to seal. Place on a parchment-lined baking sheet, brush with egg wash, and sprinkle with raw sugar. Cut slits in tops.

Bake hand pies, rotating sheet halfway through, until juices are bubbling and pastry is golden brown, 35–40 minutes (juices will run onto parchment). Transfer to a wire rack. Serve warm or at room temperature.

For a printer-friendly version of this recipe, please click here:  Blueberry Hand Pies

Pina Colada on a Stick

Pina Colada on a Stick

When my kids were little – I definitely had to do something that I know was wrong.  Use food as a motivator.  No, I didn’t bribe them with food – but if they had a “shout out” at night (when they would get out of bed and wake us up in the middle of the night, or come downstairs after it was bed time), we would take away dessert.  My girls were so obsessed with dessert – that they only seldom had “shout outs.”  Of course if there were multiple “shout outs” during the night, they would loose dessert for a progressively longer time.  I remember the worst was when I had to take away dessert for two weeks.  Those were a very miserable two weeks.  The begging was tough to watch, but I stayed strong and we got through it.

It definitely helped keep me motivated to make treats – because when there was something really worth eating, the likelihood of a “shout out” was slim to none.  Oh the games we play…  But hey, it worked, and we actually felt like we had trained them, we felt like geniuses.  I was always looking for healthy treats though – because my girls loved their fruit almost as much as they loved their baked goods.

Cooking Light printed this recipe for a fun twist on a pina colada.  The recipe in the magazine actually had alcohol in it, but I knew that my kids would go nuts for these – so I made these without alcohol.  This would have been the ideal dessert to make when they were younger and they were in that phase (minus the sharp sticks that is) – I am sure they would have slept well all week, just to get their hands on these.  The best part of course was the gelatin squares.  Boy were those refreshingly delicious.  Now if I could only figure out a way to motivate adults to behave well…then I would really be a genius.

Ingredients

  • 1 1/2 cups shredded unsweetened coconut
  • 1/4 cup coconut cream
  • 1 (13.5-ounce) can light coconut milk
  • 2/3 cup sugar
  • 3/8 teaspoon salt
  • 1 cup coconut water
  • 2 envelopes plus 1 teaspoon unflavored gelatin
  • 1/2 teaspoon vanilla extract
  • Cooking spray
  • 2 tablespoons fresh lime juice
  • 1 whole pineapple, peeled, cored, and cut into 72 chunks
  • 18 strawberries, halved lengthwise

Preparation

Preheat oven to 350°.

Spread coconut on a baking sheet. Bake at 350° for 7 minutes or until golden, stirring after 4 minutes. Combine coconut, coconut cream, coconut milk, sugar, and salt in a saucepan. Bring to a simmer over medium heat (do not boil). Remove from heat; cover and let stand 20 minutes.

Place coconut water in a medium bowl; sprinkle gelatin over top. Let stand 5 minutes or until solid.

Strain coconut milk mixture through a sieve over a bowl, pressing to extract liquid. Discard coconut. Gradually add coconut milk mixture to gelatin mixture, stirring with a whisk. Return mixture to pan; heat over medium heat just until gelatin dissolves (do not boil). Remove from heat; stir in vanilla. Pour mixture into an 8-inch square baking dish coated with cooking spray. Cool to room temperature. Cover and chill 4 hours or up to overnight. (The layers should separate naturally.)

Cut coconut mixture into 72 cubes. Thread 2 pineapple chunks, 2 gelée pieces, and 1 strawberry half alternately onto each of 36 skewers.

For a printer-friendly version of this recipe, please click here:  Pina Colada on a Stick

Layered Strawberry-Coconut Panna Cotta

Layered Strawberry-Coconut Panna Cotta

It is not often that I am banned from the kitchen – ok, maybe not banned, but it sure feels that way – when I can’t use the stove or the oven, I might as well be banned.  Not only is it hot in Seattle right now, it is humid as well – and without air conditioning, we go to drastic measures to ensure the house stays as cool as we can possibly make it.  For the most part we play the “shade game” – for those of you who have not had the luxury of playing that game – it is awesome.  You basically figure out which windows need to be closed with the shades drawn and which need to be open, at all times of the day, based upon where the sun is.  Fortunately today at the end of the day the clouds came in, and I quickly ran around the house opening every shade and every window I could.  When that hot breeze comes through the window ever so slightly – you actually feel like you have accomplished something.  That’s when you get a point.  What a fun game…too bad I have to go to the office tomorrow.

I saw this dessert in Cooking Light, and it almost passed the test to make today.  Fortunately I had made it last weekend though, so there was no temptation for me.  Seriously, I made a fancy lemonade for the girls today, as that was all my creativity could come up with.  Yes, can you tell I am preoccupied with other things?  So back to this dessert.  Strawberry season is just wrapping up here, so I knew I didn’t have a lot of time to put this one off.  Unfortunately I missed out on getting the real fresh strawberries from the stand, but I still found some at the market – and this dessert is so good, any strawberries will do.

I adapted the recipe so that it was completely dairy-free, and it was amazing.  First of all, it is definitely impressive to look at – but the taste – it was like summer in a glass.  Be patient with the layers, it took them a lot longer to set up than the recipe said – but they eventually solidified.  My favorite layer was the coconut – but that strawberry layer on the bottom was incredible as well – real strawberry jello, now when do you ever make that?  Ok, and the thyme on top – don’t skip that step, it really added a unique flavor.

Maybe there should be a bonus round for my shade game.  If you can create a dessert that doesn’t use the oven or the stove, you get an extra 100 points.  Well, actually – even better – you get dessert!

Ingredients

Strawberry gelatin:

  • 1 teaspoon gelatin
  • 1 tablespoon water
  • 3/4 cup sliced strawberries
  • 3 tablespoons granulated sugar
  • 1 teaspoon fresh lemon juice
  • 3/4 cup coconut water

Panna cotta:

  • 3/4 teaspoon gelatin
  • 1 tablespoon water
  • 1/2 cup coconut milk
  • 1/4 cup light coconut milk
  • 2 1/2 tablespoons granulated sugar
  • 1 teaspoon fresh lemon juice

Strawberries:

  • 2 cups sliced strawberries
  • 2 tablespoons powdered sugar
  • 1 teaspoon chopped fresh thyme
  • 1 teaspoon fresh lemon juice

Preparation

To prepare strawberry gelatin, sprinkle 1 teaspoon gelatin over 1 tablespoon water in a small bowl. Combine 3/4 cup strawberries, 3 tablespoons granulated sugar, and 1 teaspoon juice in a small saucepan; let stand 5 minutes. Mash mixture with a fork or potato masher. Place pan over medium-high heat. Bring to a simmer; cook 2 minutes or until sugar dissolves. Add coconut water; return to a simmer. Remove pan from heat. Add gelatin mixture, stirring until gelatin dissolves. Strain mixture through a fine sieve into a measuring cup, pressing on solids to extract as much liquid as possible. Discard solids. Divide strawberry mixture evenly among 4 wineglasses. Chill 1 hour or until set.

To prepare panna cotta, sprinkle 3/4 teaspoon gelatin over 1 tablespoon water in a small bowl. Combine coconut milks, 2 1/2 tablespoons granulated sugar, and 1 teaspoon juice in a saucepan; bring to a simmer. Remove pan from heat. Add gelatin mixture, stirring until gelatin dissolves. Cool to room temperature. Carefully pour one-fourth of coconut milk mixture on top of each strawberry gelatin. Chill 1 hour or until set.

To prepare strawberries, combine remaining ingredients in a bowl; toss gently. Let stand 5 minutes. Divide strawberry mixture evenly among glasses.

For a printer-friendly version of this recipe, please click here:  Layered Strawberry-Coconut Panna Cotta

Blueberry Coffeecake with Streusel

Blueberry Coffee Cake

Everyone needs a break now and then.  I am not just talking about a small 15-minute walk around the block brake, I am talking about a break from life. Ok, yes, those 15-minute walks are important – after what I experienced this week, sometimes you just need to get a little air.  The problem is that you have to come to that conclusion yourself – no one can tell you that it has to be done.  But believe me, it is amazing what it can do for you…

To say that things are hectic right now is an understatement.  Thursday was the last day of school for the year, although this year it was a little bittersweet.  For my younger daughter, it was a big party – but for my older daughter it was not the usual feeling.  Unfortunately I had an all-day meeting, and was extremely preoccupied – all my brain cells were focused at the time.  That was until I got the text.  The last day was fun, except for the end – everyone was crying, even the boys.  Getting that text was heart breaking.  Later I found out the teachers were crying too.  All because the school board decided to split these kids up.  I won’t get into it again, because I can no longer dwell on this horrible decision.  This summer I am working on an attitude adjustment – I am going to have a positive outlook on my daughter’s new school – and so will she.  We agreed to it.

So as I sat there in that meeting, thinking about my daughter – it hit me, I was not the only one with a life outside that room.  Life is hard – and most of the time, you really have no idea how hard it is – particularly for everyone else.  Fortunately for me, I can always turn to food – and that’s exactly what I did this weekend.  I didn’t just dabble – I was hard core – I was on a power cooking/baking frenzy, trying to get all my stress out in the kitchen.  I actually think it worked…or I am just utterly exhausted.

This was just one of the many things going on in my kitchen – a good old fashioned blueberry coffeecake.  Now, I have a favorite recipe from my mother – that just happens to be dairy-free.  I just had to see though if this dairy version from Cooking Light was better – and you know what, it wasn’t.  Don’t get me wrong, this was absolutely moist and delicious – but I actually like my mother’s recipe better – ok, who is really surprised by that?  Yes, my mother tests her recipes more than anyone else I know.  And Mom, you win again.

So I hope that I was not the only one that was able to take a break this weekend – in whatever form that is.  Even if you just took a few deep breaths…I know it will help.  Monday, I am ready for you – bring it on.

Ingredients

  • 9 ounces unbleached all-purpose flour (about 2 cups)
  • 1 1/2 teaspoons baking powder
  • 1/2 teaspoon baking soda
  • 1/2 teaspoon salt
  • 2 cups fresh blueberries
  • 1/3 cup packed brown sugar
  • 1/4 cup old-fashioned rolled oats
  • 2 tablespoons sliced almonds
  • 1 tablespoon unbleached all-purpose flour
  • 1/4 teaspoon ground cinnamon
  • 2 tablespoons butter, melted
  • 3/4 cup granulated sugar
  • 1/4 cup butter, softened
  • 2 tablespoons canola oil
  • 1 large egg, lightly beaten
  • 1 cup nonfat buttermilk
  • 2 teaspoons grated lemon rind
  • 1 tablespoon fresh lemon juice
  • Cooking spray

Preparation

Preheat oven to 375°.

Weigh or lightly spoon 9 ounces flour into dry measuring cups; level with a knife. Combine 9 ounces flour and next 3 ingredients (through salt), stirring with a whisk. Remove 2 tablespoons flour mixture; sprinkle over blueberries, tossing to coat.

Combine brown sugar and next 4 ingredients (through cinnamon) in a medium bowl. Drizzle with 2 tablespoons melted butter; toss to combine.

Place granulated sugar, 1/4 cup butter, and oil in a large bowl; beat with a mixer at medium speed until blended (about 2 minutes). Add egg; beat well. Add flour mixture and buttermilk alternately to sugar mixture, beginning and ending with flour mixture; mix after each addition. Stir in rind and juice.

Spoon half of batter into a 9-inch square light-colored metal baking pan coated with cooking spray (do not use a dark or nonstick pan). Sprinkle evenly with 1 cup blueberry mixture. Spoon remaining batter over blueberries. Sprinkle evenly with remaining 1 cup blueberry mixture. Sprinkle with brown sugar mixture. Bake at 375° for 45 minutes or until a wooden pick inserted in center comes out clean. Cool in pan 10 minutes on a wire rack; remove from pan. Cool completely on a wire rack.

For a printer-friendly version of this recipe, please click here:  Blueberry Coffeecake with Streusel

Meyer Lemon and Mango Sorbet

Meyer Lemon and Mango Sorbet

Sometimes you just need a little mango in your life.  It is spring, and the markets are starting to carry all the different produce that just make you want to have a picnic, or open your windows and let that spring air come through.  Of course in Seattle we get a few days here and there, but for the most part it stays cold and rainy until July.  So, we have to do other things to make us think that the sun is shining brightly outdoors.

My daughters love dessert – but what they love even more is getting dessert at a fancy restaurant.  They don’t get to go to fancy restaurants all that often, in fact, hardly ever.  I think because of that, it is even more special.  It just so happens that recently my younger daughter had the privilege of eating somewhere very unique – and for dessert she ordered mango sorbet.  Well, that in and of itself would have been exciting enough, but they brought the sorbet with a beautiful assortment of fresh fruit, and a delicious madeleine.  I swear she has never looked more excited.  She was almost squealing with delight at the thought of digging into this.  She enjoyed it immensely, and it was so much fun to watch.

The other week I was at the market and they had the most beautiful meyer lemons you have ever seen.  They were almost orange in color, and just as soft as can be.  I immediately grabbed them and then slowly walked around the produce section deciding what to do with them.  It was when I saw the pile of mangos that it hit me.  A meyer lemon and mango sorbet – yes!  It was so easy to make up this recipe, I basically just threw the ingredients in a blender then off to the ice cream maker.  It was delicious – entirely spring tasting, and just such a treat.  There is nothing like being able to whip up a batch of sunshine whenever you need to…

Ingredients

  • 2 mangos (about 2 cups of cut up mango)
  • 1/2 cup simple syrup
  • 1/4 cup freshly squeezed meyer lemon juice

Preparation

To make the simple syrup, put 1/2 cup of sugar with 1/2 cup of water in a small saucepan.  Heat until all the sugar has dissolved.  Cool completely.  Add mangos, simple syrup and lemon juice in a blender and puree until smooth.  Put in the refrigerator until nicely chilled.  Add the mango mixture to an ice-cream maker and follow the manufacturer’s instructions.  Freeze for about 4 hours before serving.

For a printer-friendly version of this recipe, please click here: Meyer Lemon and Mango Sorbet

Pear and Apple Crisp

Pear and Apple Crisp

January is a very dark month – and I finally figured out why.  In December, even though it starts getting dark at 3:30pm, there are tons of lights everywhere – to celebrate the holidays.  All of a sudden in January, the lights start disappearing, although it is still getting dark very early.  Top that with the fact that most of the time it is raining – sometimes I look out my window at 3:00pm, and it already looks like it is time to be heading home. Fortunately for me – I absolutely love it.  I love that it gets dark so early – for some reason I get a lot of energy when it gets dark early – I feel even more productive because it looks like you should be going to sleep, but I am still getting stuff done.  I know – I am a glass half empty girl most of the time – except in the winter.

Winter is also the time when I want to be home baking.  I love filling the house up with all those wonderful scents – but I am still a little fixated on fall – and can’t seem to move past it.  It also doesn’t help that there are still tons of beautiful looking pears at the market – and apples galore, living in Washington State.  So – I told you about one of my New Year’s resolutions about getting more sleep – but I neglected to talk about the other one I have…more dairy-free baking.

My husband has been dairy-free for quite a while now, and it seems to be working well for him.  Of course there are certain things that require that buttery taste – and substitutions will just not work – but I am on a quest to make delicious dairy-free baked goods for him this year.  Needless to say, he is very excited about 2014.

I knew that this recipe would be a winner, since I had already experimented with the Apple Crisp – but I must say – the addition of pears made this even better.  Now that I think about it – I should have added some cranberries in as well – so maybe you can try that out.  Even without dairy, the possibilities are truly endless on how to spend your time in these dark winter months.  Now get to work!

Ingredients

  • 1/2 cup firmly packed golden brown sugar
  • 1 tablespoon ground cinnamon
  • 1 tablespoon fresh lemon juice
  • 2 pounds Granny Smith apples, peeled, cored, sliced
  • 1 1/2 pounds Pears, peeled, cored, sliced
  • 1 cup all purpose flour
  • 1 cup sugar
  • 1/2 cup (1 stick) chilled Earth Balance sticks, cut into  pieces (or butter, if you can eat dairy)

Preparation

Preheat oven to 450°F.  Butter 13x9x2-inch glass baking dish. Combine brown sugar and cinnamon in large bowl. Add apples, pears and lemon juice, and toss to coat. Transfer apple mixture to prepared dish.

Combine flour, 1 cup  sugar and Earth Balance in a medium bowl. Using pastry blender or fingertips, blend  ingredients until coarse meal forms. Spread flour mixture evenly over pears and apple mixture.

Bake crisp 20 minutes.  Reduce oven temperature to 350°F. Bake crisp until apples are tender and topping  is golden brown, about 30 minutes. Let stand 15 minutes before serving.

For a printer-friendly version of this recipe, please click here:  Pear and Apple Crisp

Dairy-Free Cinnamon Apple Crisp

Dairy-Free Apple Crisp

How can it be the end of October already?  Fall is my absolute favorite baking season, and I feel like I have hardly scratched the service.  I cannot wait to get to the farmer’s market this weekend, and catch up on some much needed kitchen time.  I love travelling to new places, but boy it is good to get home.  I am in between cities right now, and I swear I could write an entire blog post about the food I have experienced this week – but it is apple time…

My husband has really been trying to stay away from dairy, and I have been encouraging it.  It is pretty easy to cook without dairy – and if I am making something with cheese, I just put cheese on part of it.  Therefore everyone is happy.  Baking is a different story though, and I am slowly learning what I can use to substitute with.  Milk and buttermilk is pretty easy – I can almost always use coconut milk, and the final product actually tastes even better – butter is a different story though.

My neighbors brought us a bunch of apples from their trees on the peninsula – and they were calling me to bake something with. I instantly thought of a crisp – and I had to make it dairy free.  I found this simple recipe on Bon Appetit online but was on a quest.  I found these earth balance sticks – and decided to give it a try.  They are not a great substitute for butter when making a cake – oil is much better for that, but I thought for a crisp they might just do the trick.  I was right – this crisp was amazing.  I shared it with my neighbors, and everyone agreed.  You would never have known that this was made without butter.  The topping was extremely simple – and gave it a nice sweet crisp bite – if you want, you could definitely add some oats for additional texture but I didn’t think it needed it.

OK – 8 days left in October and I am going to make the most of it…stay tuned!

Ingredients

  • 1/2 cup firmly packed golden brown sugar
  • 1 tablespoon ground cinnamon
  • 1 tablespoon fresh lemon juice
  • 3 1/2 pounds Granny Smith apples, peeled, cored,  sliced
  • 1 cup all purpose flour
  • 1 cup sugar
  • 1/2 cup (1 stick) chilled Earth Balance sticks, cut into  pieces (or butter, if you can eat dairy)

Preparation

Preheat oven to 450°F.  Butter 13x9x2-inch glass baking dish. Combine brown sugar and cinnamon in large bowl. Add apples and lemon juice, and toss to coat. Transfer apple mixture to prepared dish.

Combine flour, 1 cup  sugar and Earth Balance in a medium bowl. Using pastry blender or fingertips, blend  ingredients until coarse meal forms. Spread flour mixture evenly over apples.

Bake crisp 20 minutes.  Reduce oven temperature to 350°F. Bake crisp until apples are tender and topping  is golden brown, about 30 minutes. Let stand 15 minutes before serving.

For a printer-friendly version of this recipe, please click here:  Dairy-Free Apple Crisp

Banana Cream Pie

Banana Cream Pie 2

My younger daughter is a super-smeller, like me.  We have a ridiculous sense of smell.  Now I am not sure I am a super-taster, but I swear she is probably the closest thing to a super-taster that I know.  This comes in handy when things spoil – particularly milk.  My older daughter is pretty good too, but not as good as her little sister.  Years ago we were visiting some friends – both of my kids love milk – but for some reason they just weren’t drinking their milk.  After the second day, I asked what was going on – and they quietly told me that the milk tasted funny.  They thought it was because we were not at home, and maybe our friends bought a different type of milk.  I tasted it – and there it was – the milk had gone sour.  Oops.

Yesterday was a nice day – it was a holiday, and I was fasting – but what do I do when I fast?  I bake.  My excuse was that we were having some friends come over for dessert after break-the-fast.  Truthfully, I have a much easier time fasting when I am in the kitchen.  Don’t ask me why – and since I do consider my kitchen to be my place of worship – I thought it was only fitting.  I had a great day reflecting, as I slowly made this Banana Cream Pie – a recipe that I found in Bon Appetit.  The only problem with baking while fasting, is I am not able to try things along the way.  At one point I asked my older daughter (who is not old enough yet to fast) to try the filling – just to make sure we were on the right track – and boy did she love it.

It was right before dinner when I decided to make the whipped cream topping for the pie.  I whipped up the cream, and spread it on the pie.  It looked amazing.  It looked so good that I decided to take pictures before the sun came down.  I got a few good shots and then stuck it back in the refrigerator to keep cool.  At this point I was knee-deep into preparing dinner, and I just left the bowl on the counter with a few streaks of whipped cream waiting for someone to take a lick.  I finished making dinner when my husband declared fasting was over. I went right over to that bowl with the whipped cream and scooped up a little of the leftover cream – wow, that was not good.  I tried it again, boy that tasted horrible – I ran over the refrigerator and grabbed the leftover cream in the carton and took a whiff…oh my goodness, the cream I had purchased that day (with an expiration date of October 20th) was completely rancid.  I couldn’t believe it.

I sat there for a second not knowing what to do.  I certainly couldn’t let this pie go to waste – but we couldn’t eat the cream either.  So, after dinner – my husband ran out to the store to get me another carton of cream (I instructed him to open it in the store to make sure it was good), and I scraped the cream off the top of the pie into the sink.  Banana Cream Pie – take 2.  Fortunately the next batch of whipped cream was delicious – and I spread it on top of the pie.  Amazingly it was all completed before our friends arrived.  The pie was delicious – particularly with that sweet cream on top.  The filling though was perfect – nice and creamy with chunks of banana.  Oh, and everyone loved the thin layer of chocolate between the crust and the filling.

There are lots of things I plan on doing differently this year, as always – but there was one thing I added later in the day.  From now on, I am always going to smell what is in that carton before doing anything more with it – whether it is fresh off the shelf or has been sitting in the refrigerator for weeks.  I definitely learned my lesson there.

Ingredients

  • 2 ounces bittersweet chocolate
  • 2 teaspoons vegetable oil
  • Prebaked 9″ pie crust
  • 3 large egg yolks
  • 1/2 cup sugar
  • 3 tablespoons cornstarch
  • Pinch of salt
  • 2 cups whole milk
  • 2 tablespoons unsalted butter
  • 2 teaspoons vanilla extract
  • 3 sliced bananas
  • 1 cup chilled heavy cream
  • 2 tablespoons sugar
  • 1/4 teaspoons vanilla  extract

Preparation

Melt 2 ounces bittersweet  chocolate with 2 teaspoons vegetable oil and brush over a prebaked 9″ pie crust;  chill until set. Meanwhile, whisk 3 large egg yolks, 1/2 cup sugar, 3  tablespoons cornstarch, and a pinch of salt in a medium saucepan, off heat,  until smooth. Gradually whisk in 2 cups whole milk. Whisking constantly, bring  to a full boil over medium heat and boil until thickened, about 1 minute. Remove  from heat and whisk in 2 tablespoons unsalted butter and 2 teaspoons vanilla  extract. Fold in 3 sliced bananas and let cool slightly. Pour filling into  prepared pie crust, cover with plastic wrap, and chill until firm, at least 3  hours and up to 1 day. Beat 1 cup chilled heavy cream with 2 tablespoons sugar  and 1/4 teaspoons vanilla extract until firm peaks form; spoon over pie and  swirl decoratively.

For a printer-friendly version of this recipe, please click here: Banana Cream Pie