Raspberry Apple Cider Jelly

Raspberry Apple Cider Jelly

Where has all of my time gone?  I used to have a lot more – and little at a time it has been taken away from me.  I am lucky if I am able to cook or bake anything over the weekends these days – and I am living one day at a time.  If I can make it through the day without anything slipping through the cracks – that is success.  But cooking has not been the priority lately (aside from dinners each night, which have been served later and later each week).  Fortunately, I know that things are about to change soon, so there is no need to completely give up hope at this point.

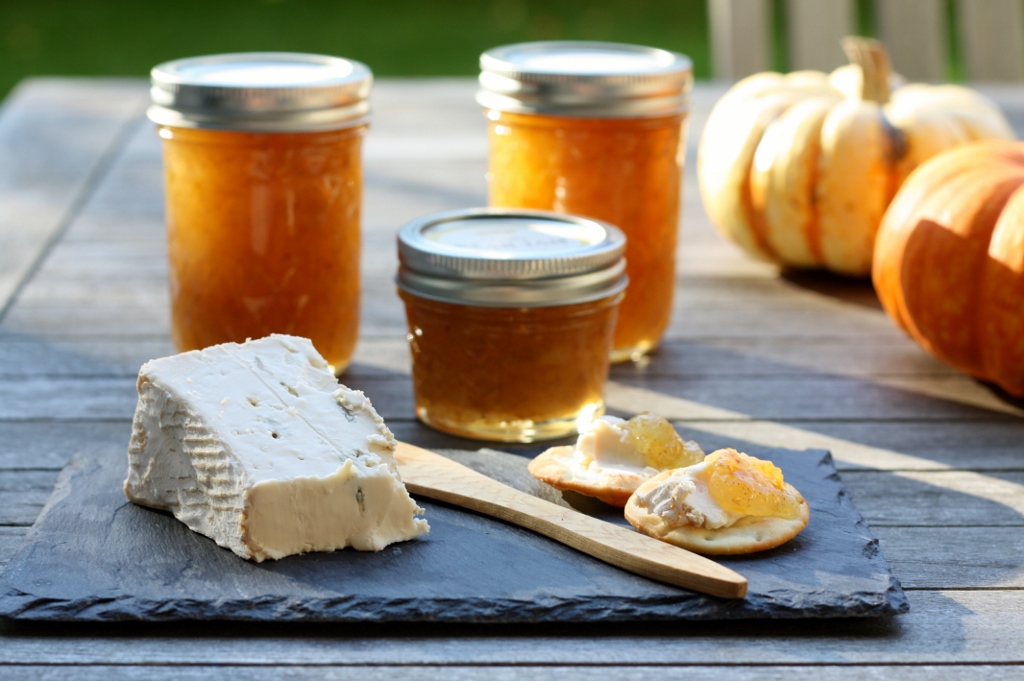
Normally I have quite the stash of jam that lasts an entire year, but for some reason this year all of a sudden, the pantry was bare.  It is around this time that I start gearing up for the next jam season, but not this spring.  There is just too much going on, that the thought of making jam just stresses me out – and it is supposed to be a relaxing activity.  So, I talked to my younger daughter about the fact that we just need to get through the next couple of months, and could I just buy some good jam from the market to get us through?  Right. She didn’t go for it at all.  She told me that she could never eat store bought jam again – and the thought of not making peanut butter and jelly sandwiches, that are just SO easy to pack in lunches, stressed me out even more.  I guess I created this mess…

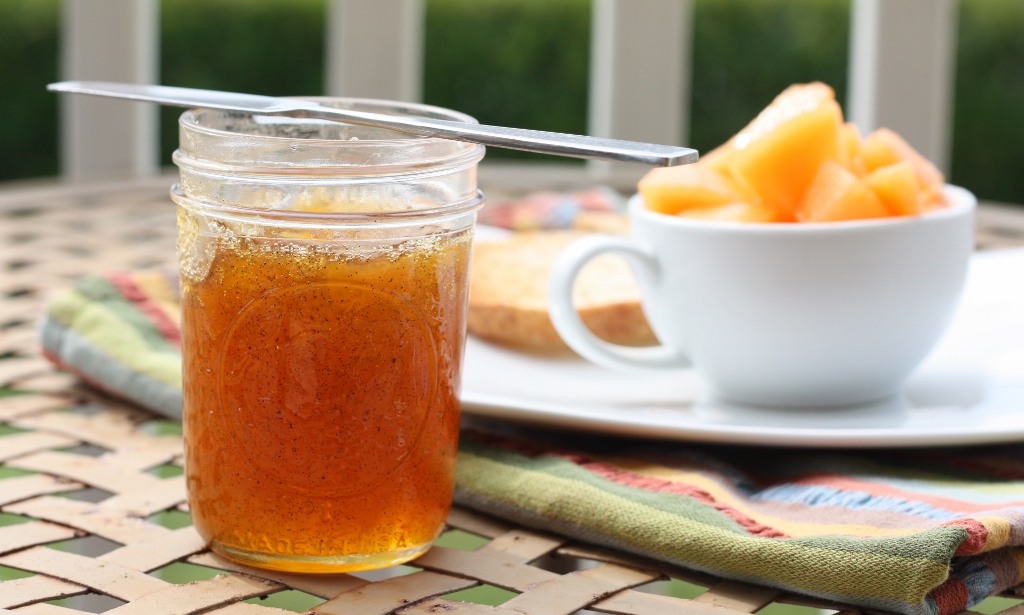
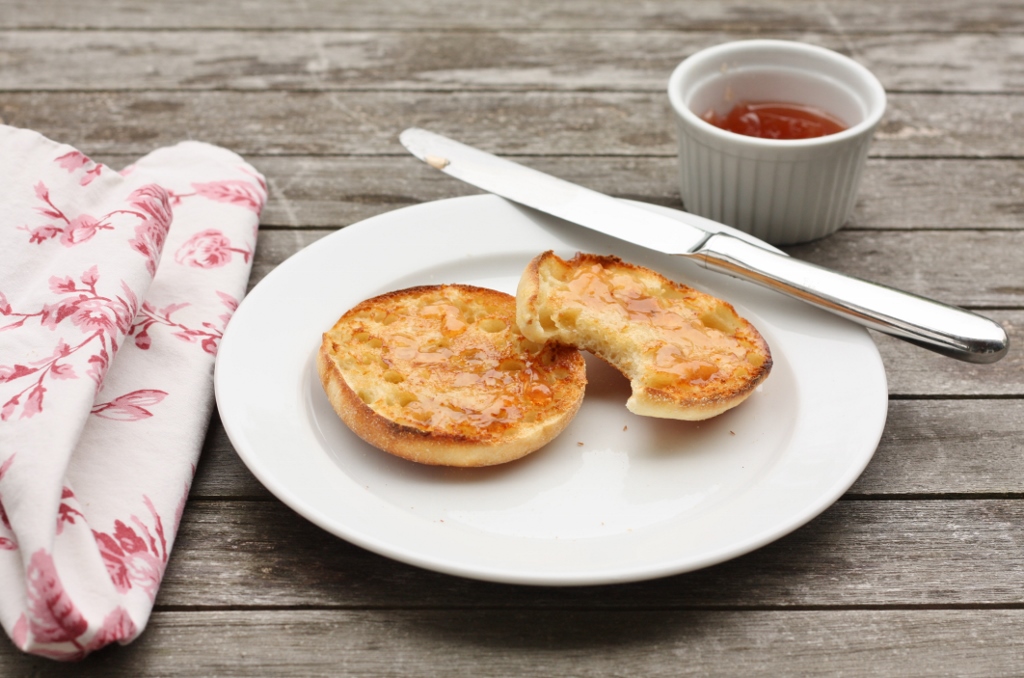
So, I went to the famer’s market to see what was in season.  There was one stand with a few stalks of rhubarb, but the price scared me away – so I ended up at my favorite apple cider stand.  I almost bought the normal spiced cider that I buy in the fall, when I noticed he had some raspberry apple cider.  That was it.  This is one of the easiest jellies to make, and with the addition of raspberry, I wouldn’t even add any other spices.  Sold.

I carved out a couple of hours (I actually blocked it on my calendar) and successfully banged out two batches of this stuff – more than enough to last the next couple of months, and boy was it satisfying.  If nothing else, it is one less thing to worry about.  Now I can focus on the other 100 things…

Ingredients

  • 3 cups of sugar
  • 1 (1.75 ounce/50 g packet) powdered pectin
  • 4 cups fresh pressed raspberry apple cider

Preparation

Fill your canning pot with water and begin to bring it to temperature. Wash your jars and rings in warm soapy water and set aside. Put your lids in a small pot of water and heat (but do not boil) in order to soften the sealing compound.

Measure the sugar into a blow. Whisk the powdered pectin into the sugar to blend.  In a large, nonreactive pot, combine the cider and the pectin-spiked sugar.  Bring to a boil and cook over high heat for 15-25 minutes, stirring frequently, until the volume in the pot is greatly reduced.  While you continue to stir, clip a candy thermometer to the pot and watch until the pot reaches 220 degrees F.  There will be a great deal of foaming and bubbling before it reaches this point.  It should look thick and syrupy and the bubbles should look glossy.

Test the set of the jelly using the saucer test (place a saucer in the freezer when you start – when you think the jam is done, place a drop on the plate and return to the freezer for 1-2 minutes, it should wrinkle when you push on it).  If it doesn’t pass, return the pot to the heat and cook for an additional 5 minutes before repeating the test.  When the jelly has reached the desired consistency, turn off the heat and fill the jars. Wipe rims and apply lids. Screw on the bands and lower into the water. Process in the hot water bath 10 minutes. When time is up, remove from water and cool on the counter. When the jars are cooled, check the seal by pressing on the top of the jar. If there’s no movement, the jar has sealed. Store up to one year in a cool, dark place.

Makes 4 pints (yield varies depending on width of pot, cooking length and juiciness of fruit).

For a printer-friendly version of this recipe, please click here: Raspberry Apple Cider Jelly

Pear Vanilla Jam

Pear Vanilla Jam

I can’t believe that October is almost over – where did this month go?  Time is just flying by, and I am seriously concerned if I blink, I might just miss something big.  October is my favorite season, and I love to savor every minute of it.  The farmer’s markets are just overflowing with amazing produce right now – and colors.  Even as busy as I have been, I have tried hard to carve out time each weekend to meander.  Usually my mind starts racing though…and I think of all the things I want to make.  Then I calm myself down, and decide if I can just make one favorite every weekend, that will be enough, but it never is…

Last spring when I was in Paris, we finally made it to this jam store that I had read about.  We walked in, and I was overwhelmed.  I thought I had a jam problem…but my pantry only has a few shelves full.  This place was overflowing with jam, all types.  It was incredible.  Then we started sampling, and I swear I was in some type of jam coma – because why on earth would I ever buy jam?  I could go into business myself.  But no, I couldn’t stop myself.  I ended up with this jar of Pear Vanilla Jam.  It was the most delicate yet sophisticated flavor of jam, and one that I just had to have.  The consistency was perfect – nice and runny.  I had to make it for myself.

I have been waiting months to see if I could reproduce that delicious concoction of pear and vanilla, and finally the pears have hit the market in full force.  Last weekend I gave it a try – and the flavor is spot on – the problem is that the consistency is a little more firm than I would like.  I am fine with it though – once it gets on that warm English muffin, it softens right up.  Although I found another really good way to serve this jam…with some creamy blue cheese.  Wow.  Talk about savoring the season.  Just give me some cheese and this jam, and life can get as hectic as it needs to be.  I will be sitting on the side, savoring every minute.

Ingredients

  • 8 cups chopped Bartlett pears (or any smooth, thin-skinned pear. There’s no need to peel.)
  • 2 vanilla beans, split and scraped
  • 4 cups sugar
  • 1 packet liquid pectin

Preparation

In a large, heavy-bottomed pot, combine chopped pears, sugar and vanilla beans (and all that bean-y goodness you scraped out). Cook over medium heat until the fruit can easily be smashed with the back of a wooden spoon. Use a potato masher or immersion blender to break the fruit down into a mostly-smooth sauce (remove the vanilla bean solids before blending).

Add the pectin and bring to a rolling boil. Let boil for a full five minutes in order to active the pectin, so that the finished product will have a nice jammy consistency.

Fill jars, wipe rims to remove any residual jam, apply lids (heat canning lids in a small pot over very low heat while you’re preparing the jam to ensure a good seal) and screw on the rims.

Process the filled jars in a boiling water canner for 10 minutes (start the timer when the pot has returned to a boil). When the time has elapsed, remove jars from pot and place the jars on a towel-lined countertop. Let them cool undisturbed for at least two hours. During this time, the lids should seal. Check to ensure the jars have sealed by pushing down on the center of the lid. If it feels solid and doesn’t move, it is sealed.

For a printer-friendly version of this recipe, please click here:  Pear Vanilla Jam

Cherry Butter

Cherry Butter

I can’t believe summer is almost over…and I have just begun to post all of the wonderful things I made.  Unfortunately this was one of the busiest summers I have had as long as I can remember.  That doesn’t mean that I stopped cooking or baking, but I definitely was not able to keep up on my postings.  So, hang with me…the next few posts will be very focused on summer produce as I catch myself up.

This year we had another killer cherry season.  We had more cherries on our tree than I have ever experienced.  And the odd thing was, the birds were a little late to the party.  We were actually able to pick about 5 pounds worth before the birds got to them.  We also had some other fun visitors this year – the rats.  I think there was just one, and boy was he happy.  I think our neighbors finally had their fill though and I haven’t seen the rat for a while.

So this year I wanted to make jam with them – but that was before I found this Cherry Butter recipe in the Food in Jars cookbook.  Once I saw this, I looked no further.  I just loved the idea of making butter out of these amazing cherries, and as you can see, it was very much like jam consistency, without the pectin.  I can’t tell you the pride I had when I had jars of this cherry butter on the counter.  It is not often that I am able to can my own produce – normally it is from the farmer’s market.  I was beaming.

So even though cherry season may be over where you live – I leave you with this fantastic recipe for next year.  And if you want to come by my house and pick your own…feel free.  There should be plenty, if this year is any indication.

Ingredients

  • 6 cups pitted and chopped sweet cherries (about 3 pounds)
  • 2 cups of sugar
  • 1 lemon, zested and juiced

Preparation

Combine the cherries and 1 1/2 cups of sugar in a large pot and bring to a summer.  Reduce the heat to low and let it gently bubble, stirring every 5 minutes or so.  If it’s sticking to the bottom, lower the heat a bit more.  Cook like this to at least an hour, until the butter has reduced in volume and it has taken on a deep wine color.

Using an immersion blender (or working in batches in a blender), carefully puree the fruit.  Taste and add the remaining sugar if you feel it needs it.  Add the lemon juice and stir to combine.  If it doesn’t seem at all watery and the texture seems sufficiently  thick, the butter is done.  If not, continue to cook until the butter is thick and spreadable, keeping in mind that it will thicken a bit more as it cools.

When the butter is nearing completion, fill your canning pot with water and begin to bring it to temperature. Wash your jars and rings in warm soapy water and set aside. Put your lids in a small pot of water and heat (but do not boil) in order to soften the sealing compound.

When it has reached a consistency that is thick and spreadable, ladle the butter into the prepared jars. Wipe rims and apply lids. Screw on the bands and lower into the water. Process in the hot water bath 15 minutes. When time is up, remove from water and cool on the counter. When the jars are cooled, check the seal by pressing on the top of the jar. If there’s no movement, the jar has sealed. Store up to one year in a cool, dark place for up to 6 months

Makes 2 pints (yield varies depending on width of pot, cooking length and juiciness of fruit).

For a printer-friendly version of this recipe, please click here:  Cherry Butter

Apple-Cranberry Jam

Apple-Cranbery Jam

Someone needs to shake some sense into me.  A wise man once said, “If it is worth doing, it is worth overdoing.”  Yes, I often feel like those are the words I live by – particularly this time of year.  If you look into my pantry right now, you would completely agree with me.  We are on the final countdown to Thanksgiving – but that is not the only thing going on in our family at the moment.  We are about to embark on the Trifecta of holidays – Thanksgiving, Hanukkah and my younger daughter’s birthday – yes, all on the same day.  She could not be more excited.  Me, well, I would rather spread the cheer, but it is what it is.

I got back from another adventure, only to be thrown right into the birthday celebrations.  Last week was not my best international travelling experience when it came to sleeping.  For some reason almost every night between 2:30 and 3:00am, I decided I had slept enough, and it was time for my body to wake up.  I was exhausted. Three hours of sleep a night is not nearly enough for me – I can get away with it for a couple of nights – but then I really turn to mush.  The good news – I was finally able to sleep on the airplane – I was just done.  I couldn’t take it any longer.

Aside from birthday baking this weekend, I had to get one last batch of jam in before I call it quits for the season.  With Thanksgiving coming right around the corner, I decided to try out a new recipe from Food in Jars using cranberries and apples – both which I found at the farmer’s market this weekend.  This jam is mighty delicious – and so versatile.  I could see this on a peanut butter sandwich, as well as a turkey sandwich.  Oh, and on a bagel with cream cheese – it would make it sing.  So – as you are preparing for your Thanksgiving feast – why not make a batch of this.  And if you really want to make your guests happy, give them a small jar as they are leaving.  Again – this is the time of year where people tend go a little overboard – and my philosophy is, if you can over do it now, then you can rest later.  Is it later yet?

Ingredients

  • 8 cups of peeled and diced apple (approximately 5-6 large apples, 1/2 inch dice. Use a softer apple like a Golden Delicious. Firm apples won’t cook down as well.)
  • 4 cups of whole cranberries
  • 6 cups sugar
  • 1 cup water
  • 2 lemons, zested and juiced

Instructions

Combine the apples, cranberries, sugar and water in a large pot (use a big one, this jam will bubble) over high heat. Bring to a boil, skimming off the foam that develops on the top of the fruit. Cook for 10-15 minutes, until the cranberries pop and the apples soften.

Add the lemon zest and juice and simmer until the liquid in the pot begins to thicken (because both apples and cranberries are naturally high in pectin, you won’t need any additional pectin to help this jam set, as long as you cook it until thick and syrup-y).  If you like a smoother jam, now is the time to use an immersion blender.

Ladle into prepared jars, wipe rims, apply lids and process in a boiling water canner for 10 minutes. Label nicely and distribute to those you love.

Makes about 4 (1-Pint) Jars.

For a printer-friendly version of this recipe, please click here:  Apple-Cranberry Jam

Cantaloupe Jam with Vanilla

Cantaloupe Jam with Vanilla

What a week – and it is only Wednesday!  I better pace myself, or I will not make it to the weekend, and my taste buds are counting on it.  I just came back from a really quick work trip.  Normally I travel very far away for work, but this time I spoke at a conference that just happened to be in the US – thank goodness.  Fortunately I was able to fly back today and make to a meeting that started at 1pm.  Of course, no trip can be complete without something going on at the home front.  While I was on the airplane, the school nurse called my husband – this time for my older daughter.  I am really hoping that next week we can go 5 entire days without a call from the school nurse.

I visited a serious food town this week, and I really was not expecting it.  Nor was I expecting who I was able to meet.  So Monday night I was in my hotel room studying the slides for my talk, when I got an email that one of my favorite food bloggers had posted an entry.  That was exactly the excuse I needed to stop what I was doing and procrastinate just a little more.  I actually wanted to email Kristy because I had a feeling she lived near where I was going – but that never happened.  So, instead I wrote a comment on her blog and let her know where I was.  Little did I know that she worked very close to the hotel I was staying at – so we arranged to meet for a drink.  It really brought me back to elementary school when I had a Pen Pal who lived in Maine.  One summer we decided to drive up and meet her family – and we were instant friends.  We actually formed quite a bond with all those letters.

It was exactly the same situation, but this time we have gotten to know each other through our blogs.  We have emailed each other a few times over the years – but mostly I keep up with her through her stories.  When I met her, I felt like we were old friends, and that we had known each other for years.  We had a terrific evening with excellent food, really getting to know each other – and piecing the holes together from our respective stories on our blogs.  Even though this is not at all why I started a blog – it is really a bonus to have met such a great person.

Now what does this jam have to do with all this?  Well, I made this jam at my mother’s house this summer.  I love cantaloupe – and when I saw this recipe in Food in Jars, I had to give it a try.  The problem is that we really don’t get great melon out here.  Growing up, I would always have the most delicious melon at my grandmother’s house – so I waited until I was on the east coast to test it.  This jam was out of this world.  I had it for breakfast almost every morning – it seriously tasted like a creamsicle.  What an incredible treat.  Just like meeting Kristy.  It was an unexpected treat, which is definitely the best kind.

Ingredients

  • 3 cups chopped, peeled cantaloupe
  • 1 1/2 cups sugar
  • 1 vanilla bean, split and scraped
  • zest of 1 lemon
  • 1 tablespoon freshly squeezed lemon juice
  • 1 (3 ounce) packet liquid pectin

Preparation

Prepare a small boiling water bath canner and 3 half pint jars. Place lids in a small pan of water and set to a bare simmer.

Combine the cantaloupe, sugar, and vanilla bean pod and seeds in a non-reactive pot and bring to a boil. Boil for 8-10minutes.  Add the lemon juice, zest and pectin and return to a boil for an additional 3 to 4 minutes, until the bubbles look thick.  Remove the vanilla bean pod and discard.

Carefully ladle jam into jars (depending on the concentration of the sugars in the fruit, it may reduce down further and leave you with just two half pints. Prepare to be surprised). Wipe rims, apply lids and rings and process in your small boiling water canner for 10 minutes.  When time is up, remove jars from pot. Let cool. When jars are cool enough to handle, remove rings and test seals. If seals are good, store jars in a cool, dark place. If any of the jars did not seal, put those jars in the fridge and use within a month or two.

Yield: Makes 3 half-pints

For a printer-friendly version of this recipe, please click here:  Cantaloupe Jam with Vanilla

Black Cherry Jam

Black Cherry Jam

Cherry season lasted a good long time this year.  Our trees had an abundant supply of cherries, enough for us to have our own stand at the Farmer’s Market this year.  But, like in other years, the birds won again.  It is the same battle every year, and every year we lose.  We think the birds are getting smarter also – they are eating the cherries before they are completely ripe – really eliminating our chances of ever having a tree ripened cherry.  The other problem is the worms.  I really have such respect for those organic farmers.  I am not sure how they do it – but somehow they manage to keep all the worms out of the cherries – either that or they are so small, we have no idea what we are actually eating.

Either way – I didn’t even really try this year (ok, the truth is I hate to lose) – I saw the beautiful cherries in at the market, and I just paid the hefty price.  I couldn’t let another year go by without making some Cherry Jam – from the Food in Jars Cookbook.  There are so many varieties of cherries at the market, I had no idea which kind to buy.  I knew I wanted Sour Cherries, but do you think there are cherries with that name?  Of course not.  So – I bought a variety, and had my younger daughter taste the cherries for me.  It was hilarious – she told me that all the cherries were sour, but she had to keep trying them to make sure.  My husband then came in and ate one of the cherries and starting laughing – they were not sour at all – in his mind they were sweet.  Ok then…

I decided just to make the jam anyway – even with the risk that I would be making something like cough syrup.  After the fruit was broken down – I tried it, and it was definitely sweet – maybe a little too sweet – so I went to the refrigerator to see what I could add.  The limes were just staring me in the face – so I grabbed them.  I juiced and zested 2 limes, and boy did that change the dynamic of the jam.  All of a sudden it had a little tang to it – and wow was it delicious.

If you haven’t been paying attention, the pantry is getting pretty full of jam.  I am not done yet though…we haven’t even hit fall.  Yes, I definitely have a problem.  Now how am I going to get myself out of this jam?

Ingredients

  • 6 cups pitted and mashed sour cherries (about 3 pounds)
  • 3 cups sugar
  • 1 packet liquid pectin (3 oz.)
  • zest and juice of 2 limes

Preparations

Prepare a small boiling water bath canner and 6 half pint jars. Place lids in a small pan of water and set to a bare simmer.

Combine the cherries and sugar in a roomy, non-reactive pot and bring to a boil. Bring to a boil over high heat and let it bubble for a good 20 minutes, occasionally skimming the foam from the surface of the fruit as it develops.  Add the pectin and boil for another 5 minutes.  You want to cook it until the bubbles are thick and look like molten lava.

Carefully ladle jam into 6 half pint jars.  Wipe rims, apply lids and rings and process in your small boiling water canner for 10 minutes.  When time is up, remove jars from pot. Let cool. When jars are cool enough to handle, remove rings and test seals. If seals are good, store jars in a cool, dark place. If any of the jars did not seal, put those jars in the fridge and use within a month or two.

Yield: Makes 3 pints

For a printer-friendly version of this recipe, please click here:  Black Cherry Jam

Apricot Jam

Apricot Jam 2

I finally made it back to the kitchen.  Thank goodness  – that’s just about all I can say at this point.  When we built our house many years ago, I remember working with the architect to tell him what our dream house would look (hoping we could afford something close to it), and I specifically spent a lot of time talking about the kitchen.  I told him I wanted a really big kitchen, that I plan on spending most of our time there, and I needed a big counter for all of my crazy food projects.  On the plans, it definitely looked like he centered the house around the kitchen, which was ideal.  It wasn’t really a “great room” concept, it was really just a big kitchen, with some other spaces next to it.  Although I was still worried that wouldn’t be enough.

Soon the framers came and the kitchen was framed in – that’s when it set in that I actually got what was hoping for – and maybe it was even too big.  Of course, over the years I have found use of every inch of my kitchen, and when I am stressed, there is nothing I want more than to be in my big kitchen all by myself – no music, no talking, no nothing – just me and the food.  This last week, that was a big void in my life.  In fact, with the little sleep that I got, I actually spent more time in my bedroom (awake typing on my phone), than any other room in my house – with the office being a close second.  It was a week that I have not experienced in quite a while – one of the most intense work weeks of my life.  The kind that makes you wonder if it is time to try something new.  Fortunately I got through it though – and this weekend, I went back to the kitchen.  I didn’t care if it was nice out – I needed to spend as much time possible making up for lost time.

So what did I do?  I jammed.  It was soothing, and peaceful, and wonderful.  The farmer’s market is abundant right now – and the apricots are just the most beautiful color and texture.  I used the recipe from the Food in Jars cookbook – and I don’t even like apricot jam.  But I am telling you – there nothing better than homemade.  I was scraping the side of the pot it was so amazingly delicious.  I can’t wait to get that onto my English muffin in the morning…wow.

We all have stressful weeks – but what is most important is how you recover.  I feel fortunate that I know what I need to regroup – it is actually a gift – because it gives me the ability to continue to forge ahead.  I always think back to that day when I first saw my kitchen – all framed with wood.  Little did I know that room would become so important in my life – so much has gone on in that room, but most of all, it is my space.  My space to be calm, be creative, and start fresh.  My space to forget about the past – and find the strength to think about the future.

Ingredients

  • 6 cups peeled, pitted, and diced apricots (about 3 pounds whole fruit)
  • 3 1/2 cups sugar
  • zest and juice of 1 lemon

Preparations

Prepare a small boiling water bath canner and 6 half pint jars. Place lids in a small pan of water and set to a bare simmer.

Combine the apricots and sugar in a roomy, non-reactive pot and bring to a boil. Boil for 10-15 minutes until the fruit thickens and runs slowly and thickly off the back of a spoon.  Add the lemon juice and zest and return to a boil.  Insert your candy thermometer into the jam and attach it to the side of the pot.  Let the jam boil vigorously until it reaches 220 degrees for 2 minutes.

Carefully ladle jam into four half pint jars (depending on the concentration of the sugars in the fruit, it may reduce down further and leave you with just three half pints. Prepare to be surprised). Wipe rims, apply lids and rings and process in your small boiling water canner for 10 minutes.  When time is up, remove jars from pot. Let cool. When jars are cool enough to handle, remove rings and test seals. If seals are good, store jars in a cool, dark place. If any of the jars did not seal, put those jars in the fridge and use within a month or two.

Yield: Makes 3 pints

For a printer-friendly version of this recipe, please click here: Apricot Jam

Apricot Jam

Strawberry Jam Biscuits

Strawberry Jam Biscuits

It’s jam time…that’s right, one of my very favorite times of the year.  The time of year when those empty shelves in my pantry start getting filled with all sorts of delicious cooked fruit.  My daughters love that I make jam, in fact my younger daughter refuses to eat any other jam except my homemade.  You could say I have spoiled them, or maybe just taught them what good food is.

I have already started stock piling for the holidays – but I always save some for the girls.  Usually I just put the leftovers in a ramekin, or in a jar that is not labeled, that I place on a special shelf in the pantry – “our jam section” – as opposed to the jam for gifts.  Last week I came over after a long day, and saw that there was a new jar of strawberry vanilla jam in the refrigerator.  I just about lost it.  Ok, so it wasn’t my proudest moment – but when I asked why they didn’t use the other two already opened jars of jam (one which I might add was the exact same variety, and another was the leftover jam I used for these delicious treats) – they told me that the jam with the pretty labels tastes even better.  Seriously???  I was so angry, but part of me was laughing inside (although that laughing started much later) – but I was fuming that they had just wasted one of my holiday jams.  I brought them into the pantry and showed them where I keep “our jam section” as opposed to the “holiday jam section”.  Of course the “holiday jam section” has about 30 jars already – where as ours only has about 5.  The girls didn’t understand why they didn’t get both.  Wow – that would be a lot of jam.  So – no Mom of the year award for me…

Back to this recipe…I found this in Bon Appetit, and I felt like it was time to actually bake with some jam.  These were so perfect for strawberry season – just the right amount of sweetness with the biscuit – the girls ate them every morning before swim team, and they were gone in no time.  Fortunately there is still some of that great leftover jam in the refrigerator…I just need to get a label for the jar, and it will disappear magically, so I am told.

Ingredients

Strawberry Jam

  • 12  ounces fresh strawberries, hulled, halved or quartered if large (about 3  cups)
  • 1/4  cup sugar
  • 1  tablespoon finely grated lime zest
  • 2 tablespoons fresh  lime juice

Biscuits

  • 3/4 cup sugar
  • 2  teaspoons  baking  powder
  • 3/4 teaspoon kosher  salt
  • 2 1/4 cups  all-purpose  flour plus more
  • 1/2 cup (1 stick) chilled unsalted butter, cut into 1/2-inch pieces
  • 1 teaspoon finely  grated lime zest
  • 3/4 cup buttermilk
  • 1 large egg, beaten to blend
  • 1 tablespoon raw  sugar
  • Vanilla ice cream (for  serving)

Preparation

Strawberry Jam

Cook strawberries and sugar in a medium saucepan over  medium-high heat, stirring occasionally, until jamlike in consistency, 12–15  minutes. Remove from heat; stir in lime zest and juice. Pour into a shallow bowl  and let cool.

Biscuits

Preheat oven to 400°. Whisk sugar, baking powder, salt, and 2  1/4 cups flour in a large bowl. Add butter and lime zest and blend with your  fingertips until coarse crumbs form. Add buttermilk and, using a fork, mix until  just combined. Transfer to a lightly floured surface. Gently knead just until a  shaggy, moist dough forms, about 4 times.

Roll out dough about 1/2-inch thick. Using a 2 1/2-inch  biscuit cutter or inverted glass, cut out rounds. Gather scraps and repeat  rolling and cutting until all dough is used.  Place biscuits on a parchment-lined baking sheet. Using your  thumb, make a large divot in the center of each biscuit; brush with egg and  sprinkle liberally with raw sugar. Spoon a scant 1 teaspoon strawberry jam into  each divot.

Bake biscuits until golden brown, 18–22 minutes. Serve warm  with vanilla ice cream, if using, and remaining jam.

DO AHEAD: Jam can be made 3 days ahead.  Cover and chill.

For a printer-friendly version of this recipe, please click here:  Strawberry Jam Biscuits

Strawberry Jam Biscuits 2

Raspberry Jam

Raspberry Jam 2

When my kids were in day care – I had no idea how lucky I was that I didn’t have to provide food.  The day care they went to served breakfast, lunch and a morning and afternoon snack – all cooked on the premises by “the cooker” as my girls called her.  It was my older daughter that coined the phrase, and it stuck – and to this day, it still makes me smile.  When my girls started school – I was actually excited to start making them lunches.  That lasted a few weeks.  Years later, it is one of the chores I dread the most.  I have run out of ideas, and feel like I am giving them the same things day after day.  They are always asking me to pack their thermos, but the problem is that I have to be home in the morning (with some extra time) to do that – and normally I leave so early in the morning that I pack their lunches the night before.

My older daughter is a cold-cut person – she just wants her meat and cheese – hold the bread.  My younger daughter on the other hand, is all about the bread – and wants peanut butter and jelly every day.  That was never something I liked as a kid, and my older daughter is the same way.  I would ask for a PB&J, hold the J.  What I realized recently is the bread is important, but the jelly is critical.  She has become quite the jam/jelly aficionado – I think I have mentioned this before on the blog, but she refuses now to eat any jam/jelly that is not homemade by me.  I have ruined her for life.  Her favorite?  She has lots of favorites, including this raspberry jam from Food in Jars.  As you can see by the jar, there was hardly any left to take a picture of!  I wasn’t able to make a big batch the first time – but let me tell you – as soon as the raspberries show up at the fruit stand down the street – I will be making jars of this stuff.  Enough to last for months – because she loves it that much.

If anyone has any interesting ideas of lunches for my kids, I would love to hear them.  I have 10 lunches to make, just this week – OH WAIT!!  No school on Friday – hooray for that, and only 8 lunches to go until the weekend!!

Blog update…I thought I lost the original pictures that I took of the jam, but somehow they appeared!  Now you can see the full jar below.

Ingredients

  • 6 cups crushed raspberries (about 2 dry quarts)
  • 4 cups of sugar
  • 1 lemon, juiced
  • 1 packet (3-ounces) liquid pectin

Preparation

Fill your canning pot with water and begin to bring it to temperature. Wash your jars and rings in warm soapy water and set aside. Put your lids in a small pot of water and heat (but do not boil) in order to soften the sealing compound.

Combine the crushed berries and sugar in a large pot and stir to combine. Bring to a boil over high heat and stir frequently until all berries have broken down and the bubbles look thick and viscous, about 15-20 minutes.  Add the pectin and lemon juice and bring to a rolling boil for a full five minutes.

Turn off the heat under the jam and fill jars. Wipe rims and apply lids. Screw on the bands and lower into the water. Process in the hot water bath 10 minutes. When time is up, remove from water and cool on the counter. When the jars are cooled, check the seal by pressing on the top of the jar. If there’s no movement, the jar has sealed. Store up to one year in a cool, dark place.

Makes 4 pints.

For a printer-friendly version of this recipe, please click here:  Raspberry Jam

Raspberry Jam

Rhubarb Jelly

Rhubarb Jelly 2

I am just too busy right now…I have so many things I want to do, and the weekends just seem to fly by and my lists just get longer.  Jam season is among us, and I feel like I could spend days in the kitchen (before it gets warm), cooking down fruit into a glorious state – just ready to pour into jars.  I had all intentions of making some this weekend – but too many other things got in the way.  I just hope I am not missing my opportunity for some of the ripe fruit – particularly rhubarb…

Last year when I took the jam class that really gave me the itch, one of the recipes we made was a wonderful rosemary rhubarb jelly.  It was a glorious pink color – like a pink rose – and the taste was incredible.  Even my younger daughter couldn’t get enough of that jelly with her peanut butter.  At that point the rhubarb was just about done in the markets – and I was so disappointed – but I had so many other jams and jellies on my list, I didn’t think too much about it.  I figured it would be at the top of my list for this year.

Late in the summer a friend of mine called me – she really wanted me to teach her how to make jam – with the fruit from her garden.  She had frozen a ton of rhubarb and raspberries – two of the fruits that I didn’t have time to turn into jam.  I was so excited.  I found a recipe in Food in Jars for rhubarb jelly – and boy was it amazing.  I actually made this jelly last summer, and it has been sitting in my pantry all this time.  We have been slowly going through my stash of jam/jelly, and finally it was time to open this one.  The color was not nearly as pink as the first time I made it in class – but I think it was the variety of rhubarb that we were using.  The stalks were not deep red  – but it didn’t matter at all.  The jelly tasted incredible.  My younger daughter told me again last week, “Don’t ever buy jam or jelly in the store again – I will only eat yours.”  Ok – so is that a compliment or what??  I may not be super-mom (a story for another time) – but boy can I make jam and jelly.  Maybe they will let it go to the top of the list next weekend…

Ingredients

  • 1 1/2 pounds rhubarb, chopped
  • 3 cups granulated sugar
  • 1 (1.75 ounce/50 g packet) powdered pectin

Preparation

Fill your canning pot with water and begin to bring it to temperature. Wash your jars and rings in warm soapy water and set aside. Put your lids in a small pot of water and heat (but do not boil) in order to soften the sealing compound.

Combine the chopped rhubarb and 3 cups water in a pot.  Cover and simmer for 20 to 25 minutes, or until the rhubarb has completely broken down and the water is tinted a vivid pink.

Line a large, fine-mesh sieve with cheesecloth and place it over a large bowl.  Pour the cooked rhubarb through.  Let it sit and drip for at least 30 minutes.  Do not press the rhubarb pulp, as that will make your jelly cloudy.  Discard the solids in the sieve and measure out 4 cups of rhubarb juice.

Measure the sugar into a bowl. Whisk the powdered pectin into the sugar to blend.  In a large, nonreactive pot, combine the rhubarb juice and the pectin-spiked sugar.  Bring to a boil and cook over high heat for 15-25 minutes, stirring frequently, until the volume in the pot is greatly reduced.  While you continue to stir, clip a candy thermometer to the pot and watch until the pot reaches 220 degrees F.  There will be a great deal of foaming and bubbling before it reaches this point.  It should look thick and syrupy and the bubbles should look glossy.

Test the set of the jelly using the saucer test (place a saucer in the freezer when you start – when you think the jam is done, place a drop on the plate and return to the freezer for 1-2 minutes, it should wrinkle when you push on it).  If it doesn’t pass, return the pot to the heat and cook for an additional 5 minutes before repeating the test.  When the jelly has reached the desired consistency, turn off the heat and fill the jars. Wipe rims and apply lids. Screw on the bands and lower into the water. Process in the hot water bath 10 minutes. When time is up, remove from water and cool on the counter. When the jars are cooled, check the seal by pressing on the top of the jar. If there’s no movement, the jar has sealed. Store up to one year in a cool, dark place.

Makes 4 half-pint jars.

For a printer-friendly version of this recipe, please click here:  Rhubarb Jelly