Black Current Scones

black-current-scones

It is the season of giving, so in that spirit, I decided to bring back my annual holiday gift post – plus a few added bonuses, thanks to my friends at Stonyfield Farms and Lavoons.  Please continue reading below for a fun holiday giveaway!

I have a very regimented super market routine which almost weekly involves Trader Joes and Whole Foods.  My favorite day to go to Trader Joes is on Sundays – and that is because of the violin player that is faithfully there every week.  I am not sure if he is homeless, but he plays the violin for money, and he is actually really good.  He wears the same clothes every week, and is super thankful when people put money in his open violin case.

This holiday season Stonyfield Farms wanted us to pay it forward, by giving us a $50 gift card to donate to a charity of our choice, or someone we know in need.  I took that gift card, and traded it in for a $50 Trader Joes card, and that’s what I left him on Sunday.  I thought he was going to cry.  I hope he has a wonderful holiday feast…

If you are wondering how you can pay it forward, how about with a holiday cooking gadget that to make life easier in the kitchen?  Every year it is so easy, and this year was no exception.  I created this list in about 5 minutes – and if it helps just one of you with holiday shopping this year, it was completely worth it.

  1. Chef’n GarlicZoom Garlic Chopper – a close friend sent this to me this year, and I swear I look for opportunities to use it because it is just that much fun!  Chopping garlic has never been so easy.
  2. Lavoons Measuring Spoons – ok, talk about fun – these are just amazing – no need to get a knife to level off your dry ingredients – this gadget has it all built in! 
  3. Large Cookie Spatula – this has been on my favorite holiday gifts list ever since I started this.  I use this for just about everything – cakes, roasts, anything that has to be moved, and requires a large surface area to do so. I have even got my husband to start using it…
  4. Silpat – I was a non-conformist for many years, and did not think I needed one of these – but this year I was sent one to try out, and I fell hard.  Cookies cook more evenly, and there is absolutely no sticking at all.
  5. Channel Knife – ever wonder how they make those pretty garnishes on cocktails?  This is the trick – and if you do it right, the lemon oils spray onto the cocktail and given the drink an extra depth of flavor.

Now for the really exciting part – Lavoons gave me an extra set to give away to one of my readers!  Please comment on your favorite cooking gadget, and you will be in the running for a set of these measuring spoons.  I will select a winner on Wednesday, December 21st at 5:00pm PST, so please don’t delay!

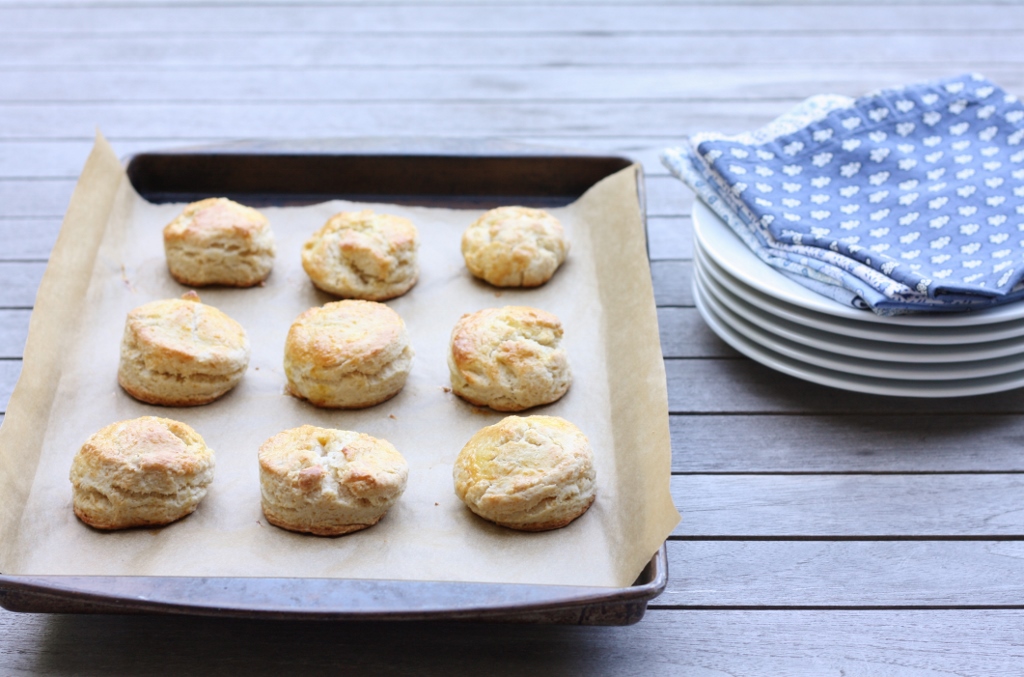
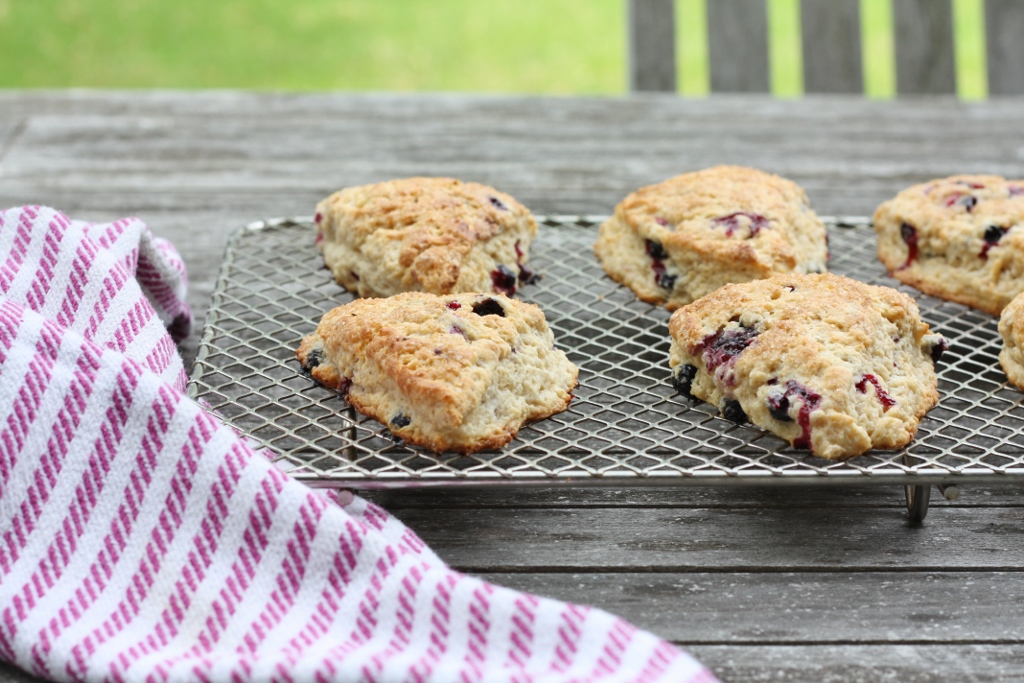
The last gift I have is this recipe for black current scones.  I made these a while ago, but just haven’t had a chance to post them yet.  Scones are just the perfect breakfast/brunch treat.  They are super easy to make, and come out of the oven ready to eat.  You can even prepare them ahead of time, and warm them up prior to serving.  I hope you all have a wonderful holiday!

Ingredients

  • 4 oz (1/2 cup, 1 stick) unsalted butter, cold
  • 12 oz (about 2 and 1/2 cups) all-purpose flour
  • 3 oz (6 tbsp) raw sugar + extra for sprinkling
  • 1 tbsp baking powder
  • 1/4 tsp baking soda
  • 1/4 tsp sea salt
  • 1 cup buttermilk, heavy cream or stonyfield farm’s whole milk yogurt, plus extra for glazing
  • 1 scant cup black currants, rinsed, picked through and stemmed

Preparation

Cut the butter into 1-inch cubes. Preheat oven to 400 degrees.

In a large bowl, whisk together flour, sugar, baking soda & powder, and salt. Add butter, and using your fingers, flatten out the butter pieces to large flakes. Mix in the buttermilk or cream just until the flour is moistened and begins to form large clumps; add the currants. Mix well and knead the dough in the bowl until it will hold together. Turn dough out onto a lightly floured board.

Sprinkle a little flour across the top of the dough and rub some flour along a rolling pin. Roll the dough into a circle about 1/2 inch thick .  Cut the circle into 8 wedges.

Place on a ungreased cookie sheet and brush with buttermilk or cream, and then sprinkle with raw sugar.  Bake for around 15-20 minutes or until brown on top.

For a printer-friendly version of this recipe, please click here:  black-current-scones

Please note: As a Team Stonyfield ambassador, I am being compensated. All opinions about Stonyfield Farm’s products and Lavoons are always my own.

Advertisement

Oatmeal Chocolate Chip Scones

Oatmeal Chocolate Chip Scones

I know it is Sunday, but I am already looking forward to Thursday.  That market basket that my husband got me for Mother’s Day is quite something.  It is like Christmas morning every Thursday night – as we unpack the beautiful wooden box with all sorts of goodies.  This week’s basket came with this wonderful box of pistachio apricot granola.  I can’t wait to put some on my yogurt in the morning.  It’s the little things that get me through this end-of-the-year chaos.

Since I was set for breakfast this week, I thought it was only fair if I made some treats for the girls.  They do love granola – but I know they love scones even more.  I have gone through many ways of saving recipes over the years.  I started by keeping every single food magazine and marking the pages where I liked a recipe.  That worked for a little while, but after I had over 20 magazines, I couldn’t remember what was in each issue.  Then I started cutting out the indexes, and had a binder of them – with the highlighted recipes that I liked.  Again, not very practical as I had to look through hundreds of pages to find what I was looking for.  The next plan was to cut out the recipe and put it in a photo album, where I had dividers of the different types of recipes.  After I filled up two binders, I was done with that method.  At that point I decided I needed to use technology, and that’s when I started my blog.  I tell you, I love being able to Bing a recipe from my blog and get to it instantly.  Technology can be quite awesome.

Instead of going to my usual stack for a scone recipe (knowing that I didn’t have any lingering around that I wanted to make), I went to one of the binders I created – and flipped to the “Breakfast” tab.  I found this recipe that I probably cut out ages ago from either Gourmet or Bon Appetit and decided to see if it had stood the test of time.  Boy did it ever – these scones were crunchy on the outside, soft and pillowy on the inside, with a touch of oat flavor, but nicely sweetened.  I could have scarfed a couple of them down, except that I reminded myself they were for the girls – I already had my treat waiting.  So, we will all be eating well this week, and we need to – if we are going to get through these last 5 weeks.  Ugh!

Ingredients

  • 1 2/3 cups all-purpose flour
  • 1/4 cup plus 2 tablespoons sugar plus additional for sprinkling
  • 1 tablespoon baking powder
  • 3/4 teaspoon baking soda
  • 1/2 teaspoon salt
  • 1 1/3 cups old-fashioned oats
  • 1 1/2 sticks (3/4 cup) cold unsalted butter, cut into tablespoon pieces
  • Finely grated zest from 1 large navel orange
  • 2/3 cup well-shaken buttermilk plus additional for brushing
  • 1/2 cup mini chocolate chips
  • Special equipment: a 2 1/4-inch round cookie cutter

Preparation

Preheat oven to 425ºF.

Sift together flour, sugar, baking powder and soda, and salt into a food processor, then add oats and pulse 15 times. Add butter and pulse until mixture resembles coarse meal with small (pea-size) lumps, then transfer to a bowl.

Stir together zest and buttermilk. Toss chocolate chips with oat mixture, then add buttermilk, stirring with a fork just until a dough forms. Turn dough out onto a lightly floured surface  and gently knead 6 times.

Pat dough into a 1-inch-thick round, dusting surface with more flour if necessary. Cut out as many scones as possible with cutter, dipping it in flour before each cut, and transfer scones to a lightly buttered large baking sheet. Gather scraps into a ball, then pat into a round and cut out more scones in same manner.

Brush tops of scones with buttermilk and sprinkle lightly with sugar. Bake in middle of oven until golden brown, 15 to 18 minutes, and transfer to a rack.

Serve warm or at room temperature.

For a printer-friendly version of this recipe, please click here: Oatmeal Chocolate Chip Scones

Adare Manor Scones

Adare Manor Scones

This morning I woke up late – I slept later than I have slept in months.  I was up at 5:30am, like I normally am, but some time over the next hour, I finally fell back asleep – and the next time I looked at the clock, it was almost 9am.  My body really needed that sleep – it has been craving it for months, at least since last summer when I was on vacation and probably got 10 hours of sleep a night.  It is amazing to me how long my body can stand to get such little sleep, and then all of a sudden once it gets a little more – it requires a ton.  I think I am to that point where I need to go on a break, just to catch up on sleep.

When I finally woke up – it was scones that got me out of bed.  Not smelling them, but the thought of making them.  Our friends are visiting, and with 5 kids in the house, it is always good to have something around for breakfast besides cereal.  This recipe from Bon Appetit has been sitting in my pantry for only a couple of months, but reading about these scones put them pretty much on the top of my pile.  I love scones, and especially love plain ones that are not sweet.  With only 2 tablespoons of sugar in the entire batch – and seeing that they were more like biscuits than scones – I knew they would be perfect with my homemade jam.  What I didn’t realize is how quickly they would disappear with 5 kids – and one of them had cereal instead!  It has been hilarious to see the number of dishes we go through every day.  Having 5 kids would definitely eat me out of house and home – and there was only one teenager in the bunch.  The appetites only get bigger from here…

These scones reminded me of the ones we get at the Puyallup Fair every fall.  After last year though, we vowed not to go back, and so it is up to me to make the scones.  No problem here – I found the recipe.  I served these with my fresh raspberry jam – and they were as close to perfect as they could have been.  Of course we had them right out of the oven – and they were tender and flakey – with a little crust on top.  Next time I am making a double batch – and maybe I will make them the night before.  Although I must say – waking up to that dough in my fingers was almost as good as waking up to the smell of fresh scones in the oven.

Ingredients

  • 1 1/4 teaspoons baking powder
  • 3/4 teaspoons kosher salt
  • 1 1/2 cups all-purpose flour plus more for work  surface
  • 1/4 cup (1/2 stick) chilled unsalted butter, cut  into 1/2″ pieces
  • 1/2 cup whole milk
  • 2 tablespoons sugar
  • 1 large egg, beaten to blend
  • Clotted cream, raspberry jam, and/or lemon curd  (for serving)

Preparation

Preheat oven to 425°F.  Whisk baking powder, salt, and 1 1/2 cups flour in a large bowl. Add butter and  blend with your fingertips until pea-size pieces form. Add milk and sugar and  mix with a fork until a shaggy dough forms. Transfer dough to a lightly floured surface and gently knead until dough just comes together, 3 or 4 times.

Gently pat dough into a  1″-thick round. Using a 2″ round biscuit cutter or inverted small glass, cut out  scones. Gather scraps and repeat, patting out and cutting to make 10 scones.  Transfer to a parchment lined rimmed baking sheet and brush with egg.

Bake scones until golden  brown, 15-20 minutes. Transfer to a wire rack. Serve warm or at room  temperature, split, with clotted cream, jam, and/or lemon curd.

DO AHEAD: Scones can  be made 8 hours ahead. Let cool completely and store airtight at room temperature.

For a printer-friendly version of this recipe, please click here:  Adare Manor Scones

Pop Tarts

Pop tarts.  Those two words meant so much to me as a child – the forbidden fruit…I had heard about them, but never actually tasted them myself.  I remember when I was about 10 – my sister and I were visiting my grandparents at the beach.  For some reason there were a lot of kids at the beach and probably 2 babysitters.  We somehow started playing a game with the other kids – and I specifically remember one of the babysitters saying that after we finish the game, it would be time for a snack.  I looked over by the sea wall, where the babysitters stuff was, and there was a box of Pop Tarts.  I felt like I won the lottery.  I couldn’t believe it – I was actually going to taste one.

A few minutes later my grandmother called down to my sister and I, and it was time for us to head back for lunch.  I asked if we could stay, but for some important reason (which I obviously can’t remember now, so it must have been REALLY important) we couldn’t.  I missed my chance.  I couldn’t believe I was so close, but couldn’t snag the prize.

Years later I actually did try my first Pop Tart, and I wasn’t that impressed.  I thought, maybe they need to be toasted to be really super delicious.  So, I toasted one, and again – I wasn’t that impressed.  I was so disappointed!  I had built up these Pop Tarts in my mind so much, and after waiting so many years – what a bummer.

I saw this recipe in Bon Appetit, and there was no way I was passing these babies up.  I decided that maybe if I made them from scratch, they would be everything I dreamed about.  I was right – they were.  They were tender and buttery – with just the right amount of sweetness – and when you broke them apart, the filling oozed out.  What a treat.  Next time I am trying them with the brown sugar filling…

Ingredients

  • 2 cups plus 2 tablespoons all-purpose flour plus additional for shaping and rolling
  • 1 teaspoon coarse kosher salt
  • 1 teaspoon sugar
  • 1 cup (2 sticks) chilled unsalted butter, cut into 1/2-inch cubes
  • 4 tablespoons ice water
  • 12 tablespoons strawberry preserves (preferably organic homemade)
  • Powdered sugar
  • Fresh strawberries

Preparation

Whisk 2 cups plus 2 tablespoons flour, coarse salt, and sugar in large bowl. Add butter. Using fingertips or back of fork, blend in butter until mixture resembles coarse meal. Add ice water by tablespoonfuls, tossing until moist clumps form. Gather dough into ball. Divide in half; shape each half into disk. Wrap in plastic. Chill at least 1 hour.

Line 2 large rimmed baking sheets with parchment. Working with 1 disk at a time, roll out dough on floured surface to about 13×11 inches. Trim to 12×10-inch rectangle, then cut into eight 5×3-inch rectangles.

Arrange 4 rectangles, spaced apart, on each sheet. Spoon 1 1/2 tablespoons preserves in row down center of each rectangle. Top preserves with second dough rectangle. Using fingertips, gently press all edges of each tart to seal; press all edges with tines of fork to double-seal. Using toothpick, poke a few holes in center of top dough rectangle. Cover; freeze tarts on sheets at least 2 hours and up to 1 week.

Position 1 rack in top third and 1 rack in bottom third of oven and preheat to 375°F. Bake frozen tarts uncovered until golden, reversing sheets after 15 minutes, 25 to 30 minutes total (some preserves may leak out). Immediately transfer tarts to rack. Sift powdered sugar lightly over. Serve warm or at room temperature with fresh berries.

For a printer-friendly version of this recipe, please click here:  Pop Tarts

Add to FacebookAdd to DiggAdd to Del.icio.usAdd to StumbleuponAdd to RedditAdd to BlinklistAdd to TwitterAdd to TechnoratiAdd to Yahoo BuzzAdd to Newsvine