Cocoa Brownies

Classic Brownies

I am trying to recover from my travels this week – the 9 hour time difference is not easy on the body, but I am doing my best.  Life doesn’t stop for you – so you just need to carry on and hope that eventually everything will go back to normal.  Whenever I travel for work, I never have enough time to soak everything in.  I do my best though to at least savor the food.  I have mentioned this before, but my favorite place to soak in the culture is at the super market.  Fortunately in Israel, I was able to go on a field trip.  I was there the week before Passover, and the woman who was hosting me was so excited that I also celebrate Passover.  She took me to the market near the office, and we bought lots of fun stuff.  Matzo ball mix, Passover biscuits, halva and chocolate covered matzoh.  What fun!  I couldn’t believe I was able to fit all this stuff into my suitcase, but I crammed it in.  As a bonus, one of the women in the office sent me a recipe for a Passover Apple Cake – maybe a post for tomorrow, if I can get my act together?

The food in Israel was delicious – lots of fresh vegetables and cheeses – and wonderful salads for breakfast.  My stomach was not overly thrilled to eat salads for breakfast, even though they were wonderful – so I mostly stuck to yogurt – which was rich and creamy, and just delightful.  The two highlights of the trip were the lunch I had at the falafel restaurant – just a tiny hole-in-the-wall, with amazing falafel and pickled vegetables.  The pita bread though was really too much though – not like the pita bread we get – this was light and fluffy and completely fresh.  The other highlight was a Persian restaurant that my cousin took me to – the salad was so amazingly fresh, and the chicken and rice I had was out of this world.  It was really a treat.

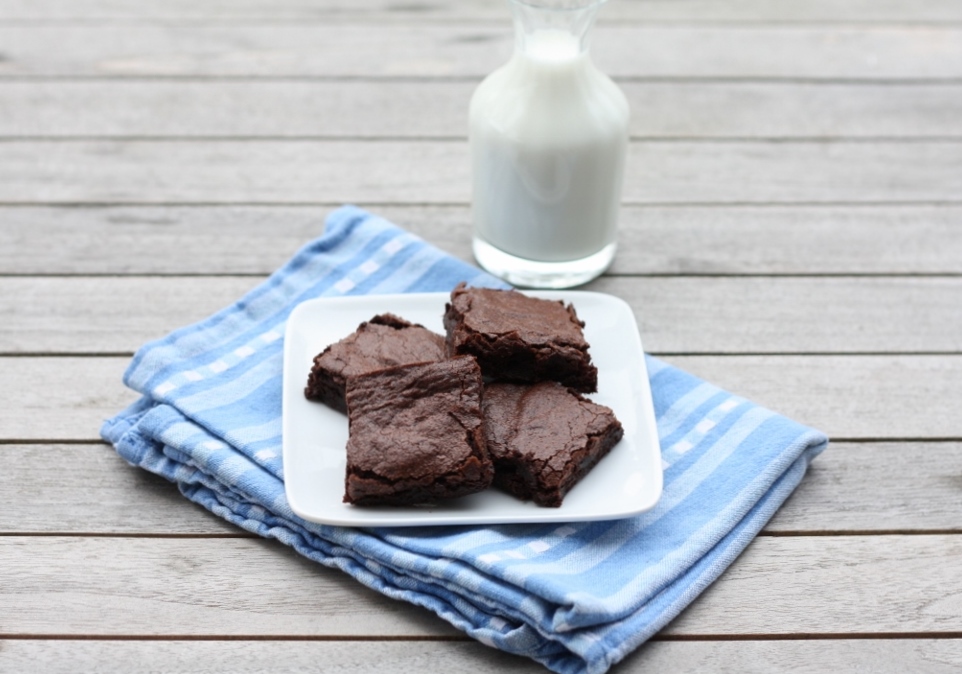
On my way back to the states, I stopped in Paris to visit the subsidiary there, and of course had my fill of magnificent food – even though I was barely there.  It gave me just a taste and I can’t wait to get back there…  At the office, they have a regular cafeteria, and then two specialty French restaurants.  We went to the “bistro” – and had an incredible lunch.  I felt spoiled.  I was stuffed after my appetizer and entrée, but they insisted I order dessert.  All the desserts sounded terrific, but I decided to go with a chocolate brownie – on top of Panna Cotta, then topped with chocolate mousse.  Oh my…it was spectacular.  Although the brownie was my least favorite part.  It was good, but nothing like these brownies that I found in Bon Appetit that I made for book club the other week.  These were so simple to make, and seriously decadent.  Nice and rich – and it had been too long since I posted a brownie recipe on this site.  I have posted similar recipes before, but this one was too good, even if it was a duplicate.  So – even though the French are pretty much better at making everything else sweet – Americans are the experts when it comes to making brownies.  Someday when I live in France, I am going to make some of these recipes with their superior ingredients – won’t that be something. I can’t wait!

Ingredients

  • Nonstick vegetable oil  spray
  • 1/2 cup (1 stick) unsalted butter, cut into 1 inch pieces
  • 1 1/4 cups sugar
  • 3/4 cup Scharffen Berger natural unsweetened cocoa powder
  • 1/2 teaspoon kosher  salt
  • 1 teaspoon vanilla  extract
  • 2 large eggs
  • 1/3 cup all-purpose flour

Preparation

Preheat oven to 325°. Line an 8x8x2 inches glass baking dish  with  foil, pressing firmly into pan and leaving a 2 inches overhang. Coat foil  with nonstick spray; set baking dish aside.

Melt butter in a small sauce-pan over medium heat. Let cool  slightly. Whisk sugar, cocoa, and salt in a medium bowl to combine. Pour butter  in a steady stream into dry ingredients, whisking constantly to blend. Whisk in  vanilla. Add eggs one at a time, beating vigorously to blend after each  addition. Add flour and stir until just combined (do not overmix). Scrape batter  into prepared pan; smooth top.

Bake until top begins to crack and a toothpick inserted into  the center comes out with a few moist crumbs attached, 25-30 minutes.

Transfer pan to a wire rack;  let cool completely in pan.  Using foil overhang, lift brownie out of pan; transfer to a cutting board.  Cut  into 16 squares.

For a printer-friendly version of this recipe, please click here:  Cocoa Brownies

Speculoos Buttons

Speculoos Cookies

There are so many different words to describe a good “spiced” treat.  Of course the obvious is just to use the word “spice” – like spice cookies or spice cake.  Of course, then there is the word “ginger” – which is my favorite (gingerbread) – and then came speculoos.  A few years ago, I was visiting my cousins in Belgium.  They were living there for a couple of years right after they got married.  What a way to start a life together!  Well, they took me to their favorite chocolate shop.  This place was amazing.  The chocolates were not only delicious, they were spectacular looking – like a piece of art.  I remember looking at the different types, and one of them was “speculoos.”  I asked them what that was, and both their eyes just rolled backwards – they loved that type.  They explained to me that it was cinnamon ginger spice.  That was the first time I had heard that word, but I guess it is pretty common, I then found a speculoos flavored macaroon, and some ice cream on the same trip.  It was so odd that I travelled all over Europe as a college student, but never encountered that word then.

Fast forward a few months, and I was reading emails on our company’s internal alias for “Food and Wine Enthusiasts” – and someone was looking for those “Biscoff” cookies that Delta Airlines carries on certain flights.  I didn’t realize they were such a hot commodity.  That conversation quickly turned to the “speculoos spread” – basically a spice spread, with a similar consistency to peanut butter.  Who knew they actually carried it at Trader Joes!  I swear this speculoos thing has almost a cult following!

A few months ago I was reading my Bon Appetit, and came across this recipe.  I almost went to the kitchen right then and there – but I had a lot going on so decided to save it for another time.  That time finally came – and you know why?  I was looking for a cookie that I could give my new mommy friends with their Shepherd’s Pie – something that could sit in the freezer until they were craving something sweet – almost like a roll of Pillsbury cookie dough.  When I saw that these cookies made three rolls – it was too good to be true.  One roll for each of my friends, and one roll for me…  OMG – AMAZING!!!!  First of all, the smell that these cookies give your house – just the perfect fall/holiday smell – ok, it is March, but who doesn’t love their house smelling like that?  They tasted great – not too sweet, but just sweet enough.  You can’t just stop at one.

So – I thought it was only fitting to post these tonight – as I sit hear waiting for my Delta flight – where I am sure I will get some of those Biscoff cookies.  Seriously though, those are good – but these mean business.  Everyone should have a roll waiting for them, without having to get on an airplane.

Ingredients

  • 2 cups all-purpose flour
  • 1 tablespoon ground  cinnamon
  • 3/4 teaspoon ground ginger
  • 1/2 teaspoon fine  sea salt
  • 1/2 teaspoon freshly  grated nutmeg
  • 1/8 teaspoon ground  cloves
  • 1/2 cup (1 stick) unsalted butter, room temperature
  • 1/2 cup (packed) light brown sugar
  • 1/4 cup sugar
  • 2 tablespoons mild-flavored  (light) molasses
  • 1 large egg, room  temperature
  • 1 teaspoon vanilla  extract
  • 1 large egg white
  • Sanding or turbinado sugar

Preparation

Whisk first 6 ingredients in a medium bowl; set aside. Using  an electric mixer at medium speed, beat butter in a medium bowl until smooth,  about 2 minutes. Add both sugars and molasses; continue to beat until mixture is  smooth and creamy, about 3 minutes. Beat in egg and vanilla; mix for 2 minutes.  Reduce speed to low; add dry ingredients and mix to blend well.

Scrape dough from bowl and divide into thirds. Using your  palms, roll each piece of dough into an 8-inch log. Wrap logs tightly in plastic  or parchment paper and freeze for at least 3 hours. (For neater edges, remove  logs from freezer after 1 hour and roll on counter.)

DO AHEAD:  Dough can be made up to 2 months ahead. Keep  frozen.

Arrange racks in top and bottom thirds of oven; preheat to  375°. Line 3 baking  sheets with parchment paper or silicone baking  mats.

Whisk egg white in a small bowl to loosen; lightly brush all  over 1 log. Sprinkle with (or roll in) sanding sugar. Using a long, slender  knife, slice off a sliver of dough from each end of log to make ends flat. Cut  log into 1/4 inch-thick rounds. Transfer to 1 baking sheet, spacing 1/2 inch  apart; place in freezer while you cut the next log. (The cookies hold their  shape better if you bake when dough is cold.) Repeat with remaining  dough.

Bake 2 sheets of cookies, rotating the sheets from top to  bottom and front to back after 6 minutes, until tops are golden brown and  centers are almost firm, 11-13 minutes. Transfer cookies to wire racks and let  cool. Repeat with third sheet of cookies.

DO AHEAD: Cookies can be baked 2 days ahead. Store airtight at room  temperature.

For a printer-friendly version of this recipe, please click here:  Speculoos Buttons

Shepherd’s Pie

Shepherd's Pie

Babies, babies, babies!!  Years ago when I was in my 20s, I remember when my friends starting getting married.  It was viral – one friend started, then everyone was dropping like flies.   It was a similar experience a few years later, when the babies started.  Even though I was right in there with the whole marriage thing, we waited a while to have kids.  I was definitely one of the last of my friends to have a baby, but I was glad I waited.  I was so ready when she finally came.  It has been many years since the baby boom, and our children are now starting to grow up – in fact, a few will be in high school starting next year.  Wow!

About a year ago, something happened.  In this day, when women are waiting longer and longer to have children, it is not a surprise that many have trouble getting pregnant.  This was not a rare occurrence with my circle of friends, in fact I was one of the few that was lucky enough not to have to deal with that.  It had been a while since any of my friends were pregnant, and I really thought we were done with that phase…not so quick.  When I got the first call, I was extremely surprised.  The doctor told her she would never have more children, and she believed it.  All of a sudden, her world was turned upside down – she had a 10-year-old, and a baby on the way.  A few months later, I found out about another good friend (and neighbor down the street) – same story, but this time with two kids – 9 and 6.  Again, she was told she would never have any more children.  The last one was quite a surprise – even though I had suspected – she has 2-year old twins.  It was amazing she got pregnant the first time, there was no way she would ever get pregnant again – at least that’s what the doctor told her.  Ok, so there has got to be something in the water now right?  I have stopped drinking it, this is just crazy.

Well – as it turns out, another good friend (our neighbor from behind) announced she was pregnant in the midst of all this craziness – she was my only pregnant friend with three kids already, but she is young with tons of energy, and always wanted four.  Both of the neighbor’s babies came last week, and the street is a very happy place.  Their babies are just perfect – I have never been much of a baby person (until I met my own), but these babies are something else.  They are just little magical beings.

I wanted to make them both some food – the only way I can really help them right now.  I wanted something comforting, and something that their other kids would like as well.  I went to the pantry where I store the recipes, and this is what I found – I knew that Cook’s Illustrated wouldn’t steer me wrong.  I thought it would be perfect – they could keep it in the refrigerator or freezer until they needed something to eat – as it turns out, this never made it to the freezer for either of them, and from what they tell me, it was the right choice.  I doubled the recipe below, and made enough for both their families, with some leftover for the girls and I – and it was the best shepherd’s pie I have ever made.

So – here’s to the new babies – but especially to their mommies…who are not getting a lot of sleep right now.  Don’t worry…if you read this blog, you know they grow up quickly!

Ingredients

  • 1 1/2 lbs. ground beef no less than 93% lean
  • 2 TB  plus 2 teaspoons water
  • 1 teaspoon salt
  • 1/4 teaspoon pepper
  • 1/2 teaspoon baking soda
  • 2 1/2 lbs. russet potatoes, peeled and cut into 1-inch pieces
  • 1/2 c milk
  • 1 large egg yolk
  • 4 tablespoons melted butter
  • 4 oz. mushrooms, sliced
  • 1 onion, chopped
  • olive oil for sautéing
  • 2 garlic cloves, minced
  • 1 tablespoons tomato paste
  • 2 tablespoons Marsala wine
  • 2 tablespoons flour
  • 1 1/4 c beef broth
  • 2 teaspoons Worcestershire sauce
  • 1 bay leaf
  • 1 teaspoons dried thyme
  • 2 carrots, chopped
  • 2 teaspoons cornstarch
  • 2 teaspoons water

Preparations

Prep the ground beef by adding the water, salt, pepper and baking soda.  Mix well!  Let rest 20 minutes.

Place the potatoes into a pot with water to cover.  Salt the water.  Bring to a boil, reduce to a simmer and cook for 8 to 10 minutes until tender.  Drain and place pot back on the stove over low heat to evaporate excess water.  Off heat, add the melted butter and mash well.  Beat the egg yolk and milk together and mix into the potatoes.  Season to taste, then cover and set aside.

In a sauté pan, cook olive oil over medium high heat.  When the oil begins to shimmer, add the onions and mushrooms.  Season with salt and pepper.  Sauté until vegetables are soft, and beginning to leave brown bits on the bottom of the pan, about 5 minutes.  Add the garlic and tomato paste and continue cooking until paste turns brown and covers the bottom of the pan.  Add the Marsala, scraping up bits from the bottom of the pan.  Add the flour and cook briefly, about 1 to 2 minutes.  Add the broth, Worcestershire, thyme and bay leaf.  Continue to scrape up bottom of the pan and then add the carrots.  Bring to a boil, scraping up any remaining bits on the bottom.  Reduce the heat and add beef in 2-inch chunks over the sauce.  Bring to a gentle simmer, then cover the pan and cook for 10 to 15 minutes.  About half-way through, break up the beef chunks with two forks.  When meat is cooked through, mix 2 teaspoons water with the cornstarch and stir into the pan to thicken, about 1 minute.  Remove pan from heat.

Pour the meat into a casserole dish and spread the mashed potatoes over the top, using an off-set spatula.  Using a dinner fork, create ridges across the potatoes.  At this point you can either wrap with foil and refrigerate for another day or put right into the oven.  Preheat the oven to 350 degrees.  Place the pan on a rimmed cooking sheet to catch any spillover and 30-60 minutes until juices are bubbling. If you would like the top to get brown and crusty, broil for a few minutes before serving.

Let rest 10 minutes before serving.

For a printer-friendly version of this recipe, please click here:  Shepherd’s Pie

Chocolate-Peanut Butter Pudding

Chocolate Peanut-Butter Pudding

The other weekend, our friend’s kids came over while we (the adults) went out for dinner.  It was a long overdue date night for the four of us, and we had a wonderful dinner at this new little restaurant.  This was the second time we were there, and our friends just loved it.  Normally when we go out for dinner, the girls get to choose what they have for dinner, as long as the babysitter can make it.  Occasionally we will be out at Trader Joes and they pick something out that they want to try – they love that.  This night though, I felt like trying out some new recipes, and they were my Guinea pigs.  I bet you can guess what I made them for dinner…if you have been paying attention.  And now we get to dessert.

My older daughter came into the kitchen when I was starting the dessert – and started laughing.  She said, “Since when do you make a gourmet meal just for the kids?”  Then I started laughing.  She was right – although I would hardly consider this gourmet.  Mac and Cheese and pudding for dessert?  Well, I guess she was right.  It’s not like I had opened up a box of Kraft Mac-n-Cheese, and then a box of Jello pudding – but seriously, both of these recipes were pretty easy – I was done with both in under an hour.  I was mighty impressed with myself – and I felt like I had accomplished so much!

Now for the pudding – I am definitely a fan of Jello brand pudding – have been for years.  It is super creamy, has a decent flavor, and if you make it yourself (with the box), you are actually adding real milk, so at least it has calcium in it.  I love how you can make pudding for dessert in just a few minutes.  But, what if I told you that it takes less than 30 to make real homemade pudding?  And, that it is wonderfully rich and creamy, with nothing artificial?  I have a feeling that would get a lot of you interested.  I saw this recipe in Cooking Light, and I put it in the pile – actually hoping that I would have a little contest with my daughter – as she made the Jello brand, I would make this.  We didn’t get to the taste test that night – since I didn’t have any Jello pudding in the house – but I know who would have won – this recipe hands down.  It just tasted real.  Oh, and did I tell you that we used up more Halloween candy in the process?  Good old Hershey Bars to the rescue.  I think I might need to write a cookbook – 100 ways to use up your Halloween candy…

So – this served 6, and when we got home we were stuffed – but there was still one left over.  Even though we had ordered one of everything on the menu, our good friend still had enough room to polish off the last one.  Good thing I licked the bowl clean when I made them…the benefits of being the cook.  Now, what are you waiting for?

Ingredients

  • 1/3 cup granulated sugar
  • 2 tablespoons cornstarch
  • 2 tablespoons Dutch process cocoa
  • 1 1/2 cups 1% low-fat milk
  • 1/2 cup light cream
  • 2 ounces milk chocolate, finely chopped
  • 1/4 cup creamy peanut butter
  • 1 tablespoon chopped unsalted, dry-roasted peanuts

Preparation

Combine sugar, cornstarch, and cocoa in a medium saucepan; stir with a whisk. Whisk in milk and cream. Bring to a boil over medium-high heat. Cook 1 minute or until thick and bubbly. Remove from heat. Add chocolate and peanut butter, stirring until smooth. Spoon about 1/3 cup pudding into each of 6 bowls. Top each serving with 1/2 teaspoon peanuts.

For a printer-friendly version of this recipe, please click here:  Chocolate-Peanut Butter Pudding

No-Boil Mac and Cheese

No Boil Mac and Cheese

I actually remember when I first found no-boil lasagna sheets.  I just couldn’t believe it.  I was probably jumping up and down in the super market, making a spectacle of myself.  The first time I made lasagna, I thought it would be easy.  Little did I know that those noodles were the death of me.  They were impossible to lay out in one piece, even if they were al dente.  Every other part of the lasagna was easy – except those dang noodles.  I quickly bought a batch and couldn’t wait to go home and try them out.  Making lasagna couldn’t get any easier – and I swear, you would have never known they were not pre-boiled.  It was magical.

Years ago, when I was really into making casseroles, I made a lot with un-boiled rice – that I baked in the oven until the rice was cooked.  There always had to be enough sauce, but it was super easy, and always tasted good.  For some reason I never thought to do that with noodles though.  I think because I found those no-boil labeled noodles, I assumed they had to be a certain type in order for the noodles to get soft in the oven.  I guess I was wrong…

I saw this recipe in Bon Appetit, and immediately cut it out.  I knew they were onto something big.  This recipe sat in my pantry for what felt like an eternity.  I had to wait for the right time – this made a lot of mac and cheese, and I had to make sure I had enough kids to eat it.  This past weekend we had some friends over, the oldest boy in middle school.  Here was my opportunity.  It was super easy to put together, and baked up perfectly.  The sauce was nice and thick, the noodles were just the right consistency – not too soft, and not too chewy.  Everyone loved it – in fact, my girls are still eating the leftovers, and loving every bite.  I have to say – that garlic breadcrumb topping is something else….as you can see, I will definitely be making this again.  And the best part?  No noodles to boil, and one less pot to clean.  Here comes the jumping again!  Double bonus points!!

Ingredients

  • 1/2 cup (1 stick) unsalted butter, divided
  • 1/4  cup  all-purpose flour
  • 3  cups  whole milk
  • 1 tablespoon kosher  salt plus more
  • 1/2 teaspoon  freshly  ground black pepper plus more
  • 1 pound elbow macaroni
  • 2 cups shredded cheddar, divided
  • 2  garlic cloves, chopped
  • 1 cup panko (Japanese breadcrumbs)
  • 2 tablespoons chopped  flat-leaf parsley

Preparation

Preheat oven to 400°. Melt 1/4 cup butter in a large saucepan  over medium-high heat. Add flour; cook, whisking constantly, for 1 minute. Whisk  in milk and 3 cups water. Bring to a boil, reduce heat to a simmer, and cook,  whisking often, until a very thin, glossy sauce forms, about 10 minutes. Stir in  1 tablespoon salt and 1/2 teaspoon pepper. Remove sauce from  heat.

Toss pasta and 1 1/2 cups cheese in a 13x9x2-inch or other  shallow 3-quart baking dish. Pour sauce over (pasta should be submerged; do not  stir) and cover with foil. Bake until pasta is almost tender, about 20 minutes.

Meanwhile, melt remaining 1/4 cup butter in a large skillet  over medium heat. Add garlic, panko, and parsley and toss to combine. Season  with salt and pepper.

Remove foil from dish. Sprinkle with remaining 1/2 cup cheese,  then panko mixture. Bake until pasta is tender, edges are bubbling, and top is  golden brown, about 10 minutes longer. Let sit 10 minutes before serving.

For a printer-friendly version of this recipe, please click here:  No-Boil Mac and Cheese

Peanut Butter Banana Smoothie

Peanut Butter Banana Smoothie 2

My kids are obsessed with the color pink – they have been all of their lives.  When they were younger and I would do the laundry, it was just a pile of pink clothes – the only positive is that everything matched all the time.  The pink spills over into other parts of their lives as well – food.  They are drawn to anything pink (strawberry flavored).  Unfortunately most of what they are drawn to is fake though…and I spend a lot of time trying to explain that to then.  Sometimes they will listen to me, but most of the time they have to try it for themselves before listening to me the next time.

The other weekend we were on vacation in Whistler.  After dinner we went out for ice-cream – yes, I know, but they love ice-cream no matter what the temperature is like.  They stared at all the flavors for quite a while, but my little one had to go with strawberry.  This was soft serve ice-cream – there was no way this strawberry was going to taste good.  Fortunately my older one choose well – vanilla.  My younger one took a couple of bites, and just set it down on table.  She was a little afraid to tell us that she didn’t like it.  The place was empty, and there were a few guys behind the counter just sitting around.  I got my husband to tell them that she had never had this before, and really didn’t like it – and would it be ok if she got a vanilla instead.  He was more than happy to get her a new one.  Thank goodness – and maybe next time she will remember.

Today we didn’t have a lot going on, and the girls needed a little pick-me-up this afternoon.  I looked at what I had in the house, and decided a fun smoothie was in order.  I asked the girls if they were interested, and boy did I get some enthusiasm.  When I told them what I was going to make, they both crinkled their noses.  They both wanted a strawberry smoothie instead – but I didn’t have anything pink to use.  My younger one was most concerned about the color of the smoothie I wanted to make – she was sure it would be ugly – again, like that has anything to do with the taste.  But I agree, something that is visually appealing, is certainly more delightful to eat.

I whipped up the smoothie, and took a spoon, I was in heaven.  I knew if they didn’t devour theirs – I would have no problem finishing them.  I handed them over, and in about 1 minute they were gone.  They both LOVED the smoothie – they told me how smart I was to come up with this combination – even though it was cream-colored.  Mom 1, Pink 0.

Ingredients

  • 6 oz. low-fat vanilla yogurt
  • 1 frozen banana
  • 1 tablespoon creamy peanut butter
  • 1/2 cup unsweetened coconut milk

Preparation

Put all ingredients into a blender, and blend until smooth.  Serve immediately.

For a printer-friendly version of this recipe, please click here:  Peanut Butter Banana Smoothie

Salted Pistachio Brittle

Pistachio Brittle 2

I made it – I actually dove into the pool and survived.  Yes, I have entered the 21st century, and the world has not come to an end.  I can’t believe what a breeze it was to use Windows Photo Gallery for my entire photo editing process.  I can’t believe how many hours (probably days) I have lost moving from program to program.  I am shaking my head as I am typing.  Pretty soon I will have my new wireless printer (that actually is wireless) and nothing will stop me.

That is…until September.  That is truly when the world will come to an end.  Tonight I took my older daughter to the Middle School open house.  Wow.  That is just about all I can say.  Wow. (Moms – any guesses on where that is from??  Yes, just about the greatest book ever.)  Chaos – that’s exactly what it was – in one word or less.  Before we left, she asked me if she should bring her cell phone in case we get separated.  What??  Of course we will not get separated.  Right.  There were more people in that school tonight than I ever could have imagined.  At one point I thought I was going to lose it – I hate crowds.

Then we both had a little freak-out session in the car on the way home, except that I pretended to be nice and calm, like a good mom should – and I let her freak out about how it is going to be so crowded, and so hard to find all the classes, and what if my locker sticks?  Then I told her about our dear friend and neighbor down the street – who couldn’t get into his locker for the first week of school, and had to carry all of his books around the entire week – including his lunch – and then one night told his mom he wasn’t going back to school.  That made her feel better – good job mom.

So – what is just about the only thing that can make anyone feel better after that?  Salted Pistachio Brittle.  This stuff is like crack, not that I have ever tried that – but it is ridiculously addicting, and amazingly delicious.  You can’t just have one bite, oh no sir-e-sir.  Good thing I had a nice pile to come home to.  This recipe from Bon Appetit is just about the best candy I have ever made – and just about the easiest.  No rolling caramel wrappers, you just break and serve.  I feel better already.

Here we go – the world is changing so fast, and my girls are growing up – but there will always be salted pistachio brittle in my life – that I know will be true.  Please remind me of that in September – I am definitely going to need some then, as I kiss my baby good-bye that fall morning…and let her into that chaotic world.  Wow.

Ingredients

  • Nonstick vegetable oil  spray
  • 1 cup sugar
  • 1/2 cup light corn syrup
  • 1 cup unsalted, shelled raw natural pistachios, very coarsely  chopped
  • 1 tablespoon unsalted  butter
  • 1 teaspoon kosher  salt
  • 3/4 teaspoon baking  soda
  • Coarse gray sea salt (such as  fleur de sel or sel gris)

Special Equipment

  • A candy thermometer

Preparation

Line a rimmed baking sheet with parchment paper; spray with  nonstick spray and set aside. Whisk sugar, corn syrup, and  3 tablespoons water  in a medium saucepan. Stir over medium heat until sugar dissolves. Fit saucepan  with candy thermometer, bring mixture to a boil, and cook until thermometer  registers 290°, 3-4 minutes.

Using a heat-proof spatula, stir in pistachios, butter, and  kosher salt (syrup will seize initially, but will melt as it heats back up).  Continue to cook syrup, stirring often, until thermometer registers 300°  and  pistachios are golden brown, 3-4 minutes. Caramel should be pale brown  (it will  darken slightly as it cools). Sprinkle baking soda over and stir quickly to  blend caramel thoroughly (mixture  will bubble vigorously).

Immediately pour caramel onto pre-pared baking sheet and,  using a heat-proof spatula, quickly spread out as thin as possible. Sprinkle  sea salt over and let caramel cool completely. Break brittle into pieces.

DO AHEAD: Brittle can be made 1 week ahead. Store airtight  between sheets of parchment paper (to prevent sticking) at room temperature. 

Pistachio Brittle

For a printer-friendly version of this recipe, please click here:  Salted Pistachio Brittle

Crunch Bars

Crunch Bars

The other week my step-father called to talk to me about his fax machine.  As he was talking to me, I was picturing the monster that sat in their kitchen, taking up precious space on their counter.  I told him that fax machines are a thing of the past – no one uses them anymore – with email, and scanners, there is just no need.  I told them to get rid of it, move into the 21st century.  He listened intently, and I could tell he wasn’t completely buying it – but he took the plunge, and gave it away.  He wasn’t going to let a huge fax machine get in the way of moving onto bigger and better things.

This weekend I bought myself a new desktop – it was about time, I had been using mine for at least 7 years, because it was right around the time that I had my younger daughter that I purchased this baby.  I love my new touchscreen monitor with Windows 8 – but to be honest you, I am typing this on my old one.  I hate to admit it, but I am having a little trouble letting go.  At one point, I tried to load my photo editing software onto my new PC, and I ran into a bit of a snag.  Now, you have to understand, I am extremely loyal to Microsoft – so, when they came out with photo editing software over 7 years ago – of course I was right there installing it – now 7 years later (long after they stopped selling the program, and created a free photo editing program within Windows 7) – I am still using it.  Mind you, I use the free software as well – everything has its specific purpose.  I digress – so, I was trying to load this and it wouldn’t let me – my new machine is a x64 bit system, and Microsoft Digital Imaging software is only compatible with a x32 bit system…  Ugh.  I know I should be using the free software, and supposedly it offers all the same functionality in a much more streamlined process – but I like my old process.  I knew exactly how to edit my photos the way I liked.

It just so happens that my step-father was visiting this weekend, and when I told him my sob story – he reminded me about the fax machine.  Yes, he is exactly right – welcome to the 21st century.

So – what does this have to do with these Crunch Bars?  Well, let me tell you.  Candy bars are almost becoming retro in my mind.  The organic chocolate bars that are sustainable and made with all natural ingredients are becoming more and more hip – and the Kit Kat bars are looking old and un-cool.  Plus, they are just taking up space in the pantry – from Halloween – yup, that’s right.  So, we decided to make something to use up some of that candy in the pantry – and Bon Appetit came to the rescue with this recipe.  Boy were these decadent – and so easy to make.  You can basically make this into anything you want – the sky is the limit.  So – if you are looking for ways to use up some of your old stuff so you can move onto the bigger and better – give this one a try.  Wish me luck as I now dive into the deep end…

Ingredients

Cookie Base

  • 1 cup (2 sticks) unsalted butter, room temperature, plus more for dish
  • 1/2 cup (packed) light brown sugar
  • 1/2 teaspoon fine sea salt
  • 1/4 cup sugar
  • 1 1/2 teaspoons vanilla extract
  • 1 1/2 cups all-purpose flour

Topping

  • 6 ounces semisweet or bittersweet chocolate or high-quality milk chocolate, finely chopped
  • 1-1 1/2 cups assorted toppings, such as cocoa nibs, crushed candy,  toasted chopped almonds and pistachios, lightly toasted coconut, and popcorn
  • Flaky sea salt (such as Maldon)

Preparation

Cookie Base 

Arrange a rack in middle of oven; preheat to 375°. Line the bottom and sides of a 13x9x2 inches metal or glass baking dish with foil, allowing 2 inches overhang on either side; butter foil in dish.

Using an electric mixer at medium speed, beat 1 cup butter in a large bowl until smooth, about 3 minutes. Add both sugars and salt; continue to beat until mixture is light and creamy, about 3 minutes longer. Beat in vanilla, then slowly mix in flour, beating until entirely incorporated (dough will be wet and sticky).

Scrape dough into prepared dish. Using your fingertips, spread into a thin, even layer.

Bake cookie base until it is golden brown and has begun to puff and crack, about 22 minutes.

DO AHEAD: Base can be made 2 days ahead. Let cool completely and store airtight at room temperature.

Topping 

Preheat oven to 375°. Scatter chopped chocolate evenly over cookie base and bake just until chocolate is soft and has begun to melt, about 2 minutes. Immediately spread chocolate in an even layer over base.

Scatter toppings over warm chocolate; lightly but firmly press into chocolate. Sprinkle with salt. Let cool in dish on a wire rack for 15 minutes. Using foil overhang, lift cookie from dish. Place on rack; let cool until chocolate is set, about 2 hours.

Carefully remove foil from cookie and slide onto a cutting board. Cut into bars.

DO AHEAD: Crunch Bars can be made 5 days ahead. Store airtight at room temperature.

For a printer-friendly version of this recipe, please click here:  Crunch Bars

Tortilla Chip Casserole

Tortilla Chip Casserole

What a week – can I say that again?  WHAT A WEEK.  There is only a part of me that is scared that tomorrow is Friday – because I know that things are exactly the way they should be yet, and that means more fun this weekend.  It’s ok, I am ready for it – and isn’t that half the battle?

It’s a good thing my husband doesn’t read my blog, because he won’t like what I am about to write about…he has some allergies that we have been dealing with.  Ok, not just some – a lot.  He found out recently that he is allergic to Soy, Gluten, Dairy, Eggs, and (wait for it…) Garlic.  Yes, all of those.  He loves protein though, so aside from the eggs, it is not that difficult for him.  It is difficult for the rest of the family though – who actually likes gluten, dairy and eggs – all mixed together.  For the most part we have been eating meat and vegetables for dinner – and boy am I lucky my girls love meat as well.  I haven’t given up baking, and really have no plans to do so – it is not fair to deprive my kids because my husband can no longer indulge.  When he only thought he was allergic to dairy, I would actually attempt dairy-free desserts – now I have basically given up – even the gluten is doable, but add eggs in there as a no-no, and it’s just that – a no-no.

So – my kids have been looking forward to when my husband travels – only at dinner time.  He was away last week for a couple of days, and we went nuts on gluten, dairy and eggs.  I was saving this casserole from Cooking Light to make – which to tell you the truth, I could have modified to try and make it safe for him, but it wouldn’t have tasted nearly as good.  I adapted the recipe slightly (substituted corn for beans) – just in case you would rather make it with beans.  The girls loved it – they had seconds, and ate it as leftovers!!  They are already planning for his next trip…poor Daddy!!

Ingredients

  • 1 tablespoon canola oil
  • 1/2 cup chopped onion
  • 1 tablespoon minced fresh garlic
  • 2 tablespoons all-purpose flour
  • 1 cup 2% reduced-fat milk
  • 1/2 cup unsalted chicken stock
  • 1 teaspoon ground cumin
  • 1/2 teaspoon ground coriander
  • 1/4 teaspoon kosher salt
  • 1/4 teaspoon freshly ground black pepper
  • 4 ounces 1/3-less-fat cream cheese
  • 1 cup organic frozen corn, thawed
  • 3 cups chopped cooked chicken breast
  • 4 ounces baked tortilla chips, crushed
  • 1  roasted red bell pepper, chopped
  • 8 ounces lower-sodium green chile enchilada sauce (such as Frontera)
  • 2.5 ounces shredded cheddar-Monterey Jack cheese blend (about 2/3 cup)
  • 2 tablespoons chopped green onions

Preparation

Preheat oven to 350°.

Heat oil in a saucepan over medium heat. Add onion; cook 6 minutes. Add garlic and flour; cook 2 minutes. ­Gradually add milk and stock, stirring constantly; bring to a boil. Remove from heat; stir in cumin, coriander, salt, pepper, and cream cheese.

Spread 1/2 cup milk mixture over bottom of a broiler-safe 11 x 7-inch baking dish. Layer corn, 1 1/2 cups chicken, and 2 ounces chips. Top with 1/2 cup milk mixture. Layer 1 1/2 cups chicken, bell pepper, and 2 ounces chips; top with 1 cup milk mixture and enchilada sauce. Sprinkle with shredded cheese. Bake at 350° for 30 minutes. Sprinkle with green onions.

For a printer-friendly version of this recipe, please click here:  Tortilla Chip Casserole

Salty Chocolate Chunk Cookies

Salty Chocolate Chunk Cookies

I am becoming a chocolate snob – ok, maybe I am already a chocolate snob, but I am finally able to admit it.  This has been a long time coming – it probably started when I was in high school, and visited England for the first time.  We had a few hours free, and I ventured to Harrod’s and went to the Food Halls.  Yes, at 14 – I was already obsessed with visiting special food places when I travelled.  Chocolate was just about the only thing I could afford, so I bought some Cadbury bars…wow, they really put Hershey’s to shame.  Now, at that point in my life, milk chocolate was all I really enjoyed, and even that was a stretch, but I would take a Cadbury bar any day of the week.

I have told the story already about the chocolate when I studied in France during college – and my friends and I found the Cote D’Or factory in Brussels – I swear we smelled our way to that pot of gold.  Still, my favorite chocolate in Europe was Lindt.  I was so excited when I found some Lindt bars in the US, only to discover that they don’t export the same quality chocolate as they have in Europe.

For some reason, even though I knew what good chocolate tasted like – I continued to use Nestle’s chocolate chips when I made cookies.  When I first moved to Seattle, a friend of mine asked if I wanted to share a CostCo sized Nestle bag of chips – of course I couldn’t say no – and much to my disbelief, it took no time at all to go through all those chips.  It only took a few times of sharing before I realized I had to start buying my own bag.  And would you believe that I only baked with these?  No, they were not getting eaten any other way.  It was only recently that I stopped buying the big bag at Costco – that was when I discovered the dark chocolate chunks I found at Whole Foods – this was real chocolate – real dark chocolate.  Dark chocolate that I have begun to really love.  And now I can’t go back…

I found this recipe in Bon Appetit and I loved how you used good quality chocolate and chopping it coarsely.  That is definitely the way to do it.  Not only are the big chunks better, the smaller chunks really get integrated into the batter.  The salt on these cookies were the best part.  I swear these were some of the best cookies I have made in a while.  They didn’t rise as much as I had expected (probably because of the type of butter I used), but they were still amazing.

Whether you are a chocolate snob or not, you will love these cookies – and if you are just starting out on the chocolate road of life – go ahead and use any type you want – even Nestlé’s will make a great cookie.  Just don’t blame me if you happen to use some good quality chips for this batch, and then you can’t go back.  Not only is it an expensive habit…it is hard work chopping up those delicious bars!

Ingredients

  • 1 1/2 cups all-purpose  flour
  • 1 teaspoon baking  powder
  • 1/2 teaspoon kosher  salt
  • 1/4 teaspoon baking  soda
  • 1/2 cup (1 stick) unsalted butter, room temperature
  • 3/4 cup (packed) light brown sugar
  • 1/2 cup sugar
  • 1/4 cup powdered sugar
  • 2 large egg yolks
  • 1 large egg
  • 1 teaspoon vanilla  extract
  • 8 ounces semisweet or bittersweet chocolate (do not exceed 72% cacao),  coarsely chopped
  • Maldon or other flaky sea  salt

Preparation

Place racks in upper and lower thirds of oven and preheat to  375°. Whisk flour, baking powder, kosher salt, and baking soda in a medium bowl;  set aside.

Using an electric mixer on medium speed, beat butter, brown  sugar, sugar, and powdered sugar until light and fluffy, 3-4 minutes. Add egg  yolks, egg, and vanilla. Beat, occasionally scraping down the sides of the bowl,  until mixture is pale and fluffy, 4-5 minutes. Reduce mixer speed to low; slowly  add dry ingredients, mixing just to blend. Using a spatula, fold in  chocolate.

Spoon rounded tablespoonfuls of cookie dough onto 2 parchment  paper-lined baking sheets, spacing 1-inch apart. Sprinkle cookies with sea salt.

Bake cookies, rotating sheets halfway through, until just  golden brown around the edges, 10-12 minutes (the cookies will firm up as they  cool). Let cool slightly on baking sheets, then transfer to wire racks; let cool  completely. DO AHEAD: Cookies can be made 1 day ahead.  Store airtight at room temperature.

For a printer-friendly version of this recipe, please click here:  Salty Chocolate Chunk Cookies

Salty Chocolate Chunk Cookies 3